Your Cart is Empty


Installation Guides
Here we provide step-by-step instructions for installing all of our Wallplanks products. Instructions for each type of product are available to review and print out, and watching our how-to videos makes the installation process even clearer. In addition to obtaining excellent final results - meaning a fantastic-looking wall - it is important you follow these instructions to ensure that your product is properly protected under our warranty.Please inspect the planks prior to installation. Contact customer service before installing if there are any cosmetic concerns. Read instructions thoroughly before beginning installation. Instructions must be followed in order for warranty to remain effective.
View Warranty Guidelines


Tools You'll Need
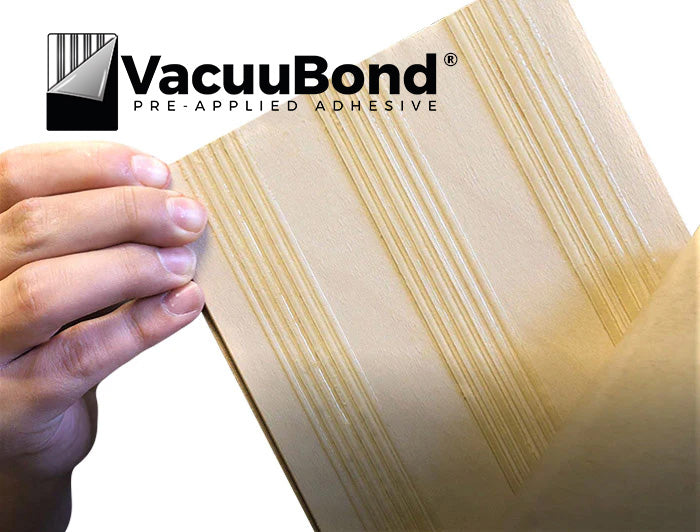
Installation of our engineered planks and wallpaper products is made simple by our proprietary adhesive backing, allowing peel-and-stick application. You will also need a few supplies to complete the job.
Cutting tools that may be necessary:
handsaw, jigsaw or miter saw.
J-Roller:
A J-roller is an important installation tool you should use after installing each plank and once the entire installation is complete.
Other tools you may need:
a tape measure, 4' level, straight edge, pencil for marking the wall and a ladder if you are installing above your height.
Don't forget to bring your imagination!
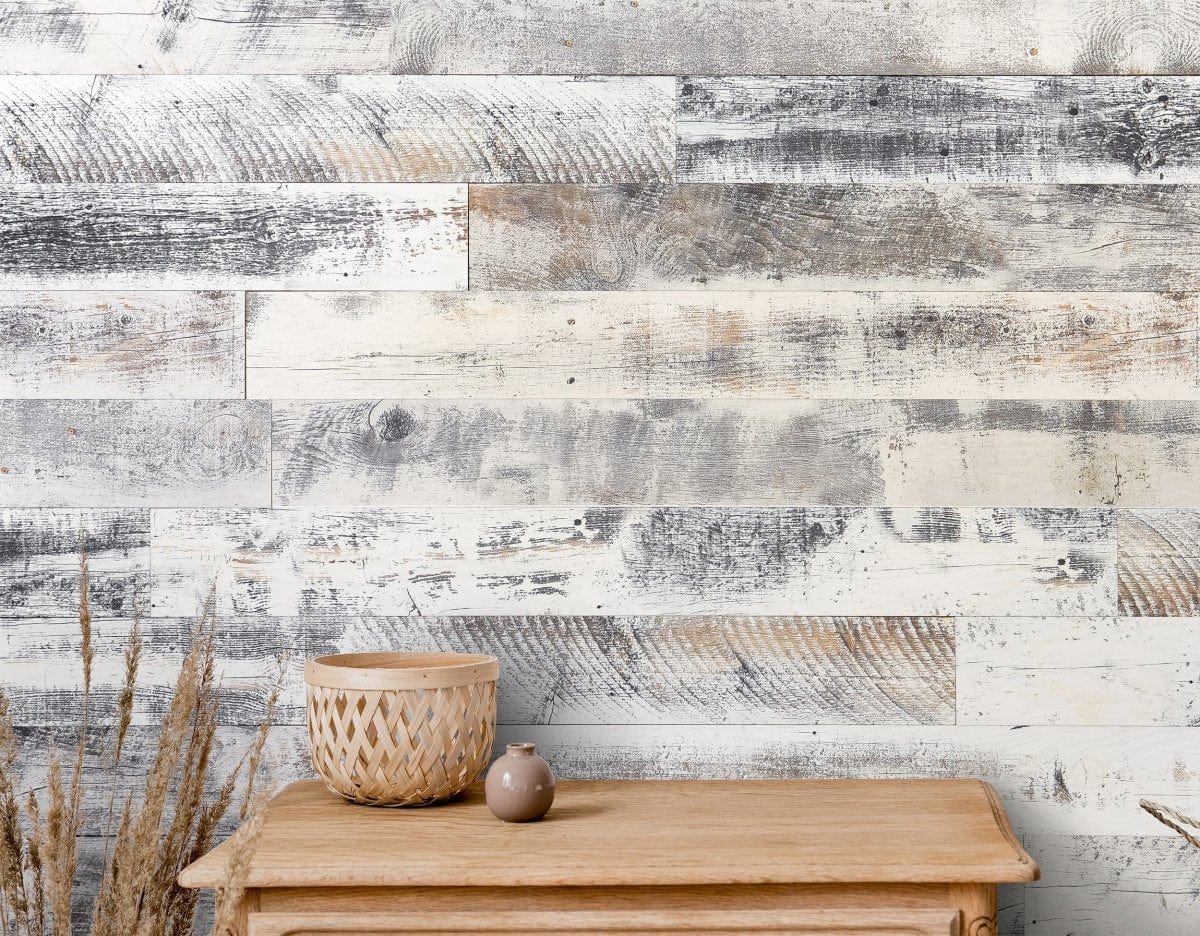
Our planks can be installed not only horizontally but vertically, diagonally, chevron or in any unique pattern you think of.
Pre-Installation Instructions
Prep the Wall.Clean Dirt and Grime.
Make sure your wall surface is ready for Wallplanks installation.
Residual grease, grime, mildew, chalked paint or any other type of surface dirt must be cleaned from the surface because these can prevent optimal VacuuBond™ adhesive bonding. We recommend sponge-washing with TSP (trisodium phosphate), available in hardware stores or home centers. Make sure that walls are completely dry before applying Wallplanks.
Heavily Textured Drywall.
Walls with heavy drywall texture will need to be block-sanded or skim-coated, and then primed, in order for the VacuuBond™ adhesive to form a firm bond.
Wallpapered Surfaces.
1. Wallplanks can be installed over well-bonded, smooth wallpaper. Textured wallpaper should be removed, and the wall should be cleaned with TSP prior to installing planks. After walls are cleaned, they must be thoroughly dried.
2. Dry Lay. Prior to beginning plank application, do a dry lay of planks on the floor of an open area. Use planks from several cartons of Wallplanks and arrange them according to your desired aesthetic.
3. More Fun with a Partner! Installation of Wallplanks is much easier if you have a second person to help, particularly in the process of establishing a completely level starting line (first row of planks you install). If working alone, it is advisable to tap 1½" finish nails halfway into the wall, every 12" along a 100% level starting line, to help position the planks accurately when installing horizontally.
4. Enjoy the Project. Take your time with installation, use care, don't take shortcuts and appreciate both the installation process as well as your gorgeous finished wall.