Your Cart is Empty


FREQUENTLY ASKED QUESTIONS
FAQ'S
Please review our Frequently Asked Questions by selecting a collection below:
-
Originals
-
Reclaimed
-
Dimensions
-
Classic Shiplap
-
Wallpaper
General Questions:
Q: What makes From The Forest Wallplanks innovative/ better than our competitors?
A:
1. Engineered from 100% REAL WOOD
2. Engineered with "Wall Flex," an HDF core and completed with a front and back face veneer that is finished with WearMax- making the planks both DURABLE & FLEXIBLE
4. Engineered with a SHIPLAP EDGE so the surface behind the planks does not peek through regardless of a change in seasons and humidity.
5.Proudly MADE IN THE USA - Central Wisconsin by From The Forest
Q: What are the advantages of the Originals Collection in comparison to Stikwood?
1.) This product is far more durable and is even slightly flexible due to the fact that it is engineered. Those planks won't break easily.
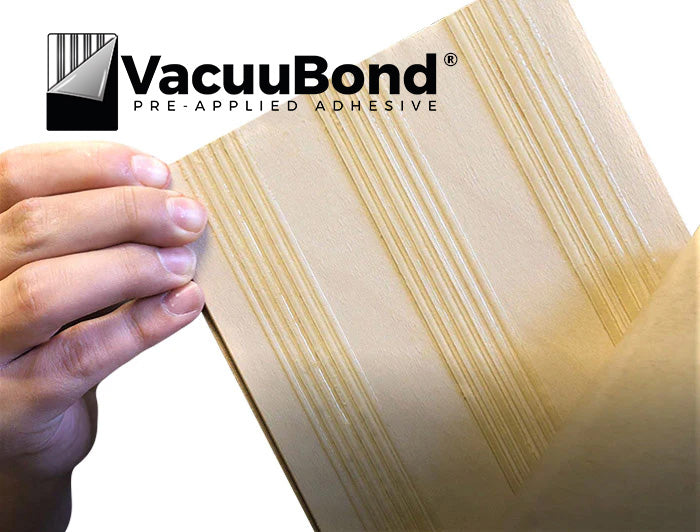
2.) The VaccuBond pre-applied adhesive is far more advanced and successful than peel and stick 3M tape and it takes less installation time to remove one single piece of release paper compared to 3 strips for tape. (https://vacuubond.com/)
3.) This product is engineered in such a way that you will not need to worry about expansion or contraction with the shiplap edge profile.
4.) No painting required! There are no holes in the planks so you do not have to paint the underlying wall prior to installation or use a touch up marker during installation.
5.) The surface is smooth and easy to clean.
6.) This product is UV cured which is a very effective cleaning procedure along with the fact that it prevents the product from fading, stains and wear.
7.) 100% environmentally friendly and made in the USA.
Q: What are the differences between the Alabaster Originals and White Classic Shiplap?
A: The Alabaster Originals has an engineered hardwood veneer on an HDF core. You will see the natural grain of the wood behind the white face. These planks are 5.1" W and have an interlocking joint profile.
The Classic Shiplap has a bright, clean, white vinyl wrapped face on an HDF core. These planks are 7.44" W and have the true nickle gap shiplap profile.
Both options are peel and stick with our pre-applied adhesive.
Q: Are Wallplank Originals California CARB compliant?
A:Yes, Wallplank Originals are California CARB compliant with zero VOC's, from a NAF (no added formaldehyde) facility, and all raw materials are sourced from FSC (forest stewardship council) certified sawmills.We use top coats and stains that are water-based and UV cured to protect air quality. Our adhesives meet the highest standards for air emissions and we are TSCA Title VI compliant. There is no added formaldehyde to any of our products.
Q: What is HDF?
A: Also referred to as hardboard, a high-density fiberboard (HDF) is a type of engineered wood product. It's made from wood fiber extracted from chips and pulped wood waste. HDF is similar but much harder and denser than particle board or medium density fiberboard (MDF).
Q: What is veneer?
A: Wallplank veneer is a thin decorative covering of fine wood applied to the front face and the back face of our environmentally friendly HDF core.
Q: What is the average length of Wallplanks?
A:Wallplanks come in lengths anywhere between 12"-47" with over 80% of the boards in a carton being the full 47" length.
Q: Can I purchase a half carton of Wallplanks?
A:We do not offer half carton options, however, we do offer individual full length boards 1.66 sq. ft. (5.1 W" x 47" L ) for $16.90 per board. Please note discounts do not apply towards single board purchases. Free shipping is still available only if purchased with a full carton order.
Q: What is your standard shipping and lead time?
A: The standard lead time from the date of purchase is 7-10 business days via UPS. Orders are processed within 2-3 business days and free shipping delivers within 5-7 business days. Please note we have no control over small parcel & LTL carrier delays due to increased shipping demands and reduced capacity.
- *UPS is environmentally friendly and ships Carbon Neutral
*Please note that some products are in high demand and may be on backorder. If you are concerned about meeting a deadline, please call us to check inventory and lead time.
*If you need to expedite an order there will be an additional fee associated with expediting. When expediting an order, please call us so we can do our best to accommodate.
*All Canadian shipments are subject to broker fees, duties and applicable taxes.
Q: What is the radius the boards can flex?
A: Wallplank boards have a built-in feature called "Wall Flex" that helps each board to contour to slightly out of flat walls. The product is notdesigned to flex around or over architecturally contoured or curved walls.
Q: What smoke and flaming rating are Wallplanks?
A: Our Wallplanks are rated Class C for surface burning characteristics of building materials. This means the flame spread index tested at 200 and smoke developed index tested at 150. Click here to view our Smoke and Flame Rating Certificate.
Q: What is the maximum heat the Wallplanks adhesive will withstand?
A: Wallplanks have been tested at temperatures of 140 degrees and the adhesive has stayed intact.
Q: Do you offer Class A fire rated Wallplanks?
A. Yes we do offer Class A fire rated Wallplanks for surface burning characteristics of building materials. Class A certified products have been tested and proven to hold up longer against flame spread. Cost is an additional $3.00/SF. Minimum order quantity is 10 cartons (200 SF). Estimated lead time is 3-6 weeks. (The three week lead time is based on From The Forest available stock. For large installations that exceed standard stock levels, assume 6-8 weeks). Please inquire with an expert to place this order. Click here for our procedure for Class A Fire Rating.
Q: Can Wallplank Originals be painted?
A:Yes, Wallplank Originals unfinished SKU's like Unfinished White Oak, Unfinished Walnut or Unfinished Maple can be painted or stained. We recommend staining and sealing a small board first. If you don't like the first coat, use 220 grit sand paper along the grain and stain/seal again. Continue to sand, stain, and seal until you have achieved your desired color. Then use higher grit sandpaper and lightly sand to remove any loose fibers. Apply one more coat of sealant and enjoy.
All other Wallplank Original colors are pre-finished and we do not recommend additional stains or painting.
Q: Are Wallplanks sound proof?
A: No, Wallplanks have not been tested to be sound proof. Wallplanks are acoustic dampening if an item were to hit the wall, similar to high heels on a hardwood floor, but no further testing or information is available regarding soundproofing.
Q: Can I hang mirrors and artwork on the Wallplanks?
A: Wallplanks are not load bearing. Wall Décor like mirrors, pictures, shelves can be mounted by drilling through the Wallplanks provided the underlying wall provides sufficient support (i.e. wall studs). Use proper hardware to install any wall décor.
Q: How do I remove excess adhesive on the Wallplank veneer?
A: To remove excess adhesive from the Wallplank veneer simply use goo gone!
Q: Are the colors on the planks the true colors that come from the wood?
A: The Backcountry, Picket Fence, and Normandy patterns have a Patent Pending infused stain process done to recreate the renditions of the reclaimed or exotic wood designs. Real hardwood veneers are used for the texture and to give authenticity to the design. All other 13 SKUs are all traditionally stained hardwood veneers.
Q: Why do some of my Wallplanks look like they have the same pattern?
A: On most Wallplank sku's there can be some pattern repeat in about every 16th board.
Reason: When From The Forestslices the veneer, the machine used to slice the veneer leaves a grain pattern that repeats. In addition, the staining process we are using to create color variation and saw marks can also repeat on every 12-16 boards. We do have a system in our production process to minimize the natural pattern repeat in the same carton but cannot eliminate the issue completely. For that reason, the Installation Instructions indicate that the planks should be "dry laid" prior to permanent installation.
Q: Can I request a custom color of Wallplanks?
A: Yes, we offer custom color runs for quantities of 3,000-5,000sf on our unfinished species. We request you send us an example of the color you would like matched for us to develop. You will then be asked to sign a document that commits to placing the order due to the high manufacturing costs of color matching. We then send you samples of the created custom color to review and agree upon. Once all parties agree, we will then proceed with production. Custom color requests for less than 3,000sf will be considered and pricing will vary by quantity requested. Please contact an expert to discuss pricing and lead time.
Q: Are additional reinforcements (ie: nails) required when installing Wallplanks?
A: No, additional reinforcements are not required when installing Wallplanks as long as the installation instructions are followed. We have 100% confidence in the strength of our Vaccubond adhesive. If you elect to use nails as added protection when adhering your Wallplanks to the wall, any nails that come in contact with a stud would be more secure than nails that do not come in contact with a stud.
Q: How do I replace a board on my wall?
A:
1. Starting with an end of row plank, remove the wall planks up to the one that needs to be replaced
2. Remove the bad plank
3. Trim off the profile of the boards before replacing
4. Use either gorilla glue or nail planks back in place
Q: Are Wallplanks removable?
A: Wallplanks are meant to be a permanent update to your walls. If you choose to remove the Wallplanks they could leave some damage to the wall underneath and/or cause paint chipping. The damage that is caused is not substantial and can be repaired easily with skim coating or spackle.
Q: How do I remove Wallplanks?
A: To remove Wallplanks you will need a putty knife or scraping tool, a heating device such as a hair dryer or heat gun, sand paper, cloth, water and TSP.
Step 1: Use the heating tool on high heat while using the putty knife to slowlyremove the plank from the wall. The heat will soften the adhesive and the putty knife will help scrape behind it to remove it. Do not move to quickly when removing otherwise the plank may snap.
*please note that the plank may cause some damage to the underlying wall and cause the paint to chip due to the strength of the adhesive.
Step 2: Use the putty knife to remove any excessive adhesive from the wall. The heating tool may also be helpful during this step
Step 3: Use the sand paper to smooth any damaged surface/ chipped paint
Step 4: Clean the wall with TSP and allow to dry completely
Q: Why are my Wallplanks not sticking to the wall?
A: We are 100% confident in the strength of the VacuuBond adhesive and have not had any issues to date that have not been related to pre-installation sub wall preparation or failure to use a J-roller. Below is a list of a few reasons why this could be happening:
1. If a J-Roller was not used immediately after installing every plank on the wall, the adhesive did not get the opportunity to adhere to the sub-wall. VacuuBond adhesive is time and pressure sensitive industrial strength adhesive and a J-Roller is a very crucial step during the installation process.
2. If the sub-wall is not cleaned with TSP prior to your installation, there could but dirt, dust, grease or grime that is making it difficult for the adhesive to adhere to the wall.
3. If the sub-wall is not completely dry prior to your installation, the adhesive will not adhere properly to the wall.
4. If the sub wall that you applied your Wallplanks to has a heavy texture, the planks may not adhere well. Surfaces with a heavy texture must either be sanded, or skim coated and primed prior to installation to avoid adhesion issues. If you are installing on ply wood, or unfinished drywall, those surfaces should have been primed prior to installation.
5. If the sub wall that you applied your Wallplanks to is not structurally sound, the adhesive may not adhere well.
6. If permanent HVAC is not maintained between 60 degrees and 75 degrees with a relative humidity between 30-55% for a minimum of 14 days prior to installation as well as during installation to insure proper adhesion.
Solutions:
1. Secure the planks that are releasing by using a brad nail and a bit of filler putty or a furniture marker to blend in over the nails.
2. Secure the planks using another commercially available adhesive such as Liquid Nails, or Gorilla Glue to adhere the planks where they have released. Make sure to apply pressure for a good amount of time so the adhesive can properly bond.
Q: Does the VacuuBond adhesive have a vapor barrier?
A: VacuuBond does not have a vapor barrier, but we do sell a membrane primer which does have a vapor barrier.
Q: Do you ship to Canada?
A: Yes, we do ship to Canada, however free shipping does not apply. The purchaser is the responsible party for all shipping costs, taxes, and duties.
How do I measure SQ. FT.?
Q: How do I calculate square footage of my wall?
A: Take the base of your wall times the height of your wall to get total square feet.
Q: How do I calculate square footage for a triangular area?
A: Measure the length of the base of the triangle and the height of the triangle. To calculate the area of the triangle use the formula: (base x height) / 2. Multiply the base by the height and then divide it by 2.
Where can Wallplanks be installed?
Q: Can Wallplanks be installed in bathrooms?
A:Yes, Wallplanks can be installed in a full bathroom. Additional nail down may be required.
Q: Can Wallplanks be installed inside shower walls?
A: No, Wallplanks should not be installed inside shower walls. Wallplanks are made from real engineered hardwood and are not waterproof.
Q: Can Wallplanks be installed as kitchen back splash?
A: Yes, Wallplanks make a beautiful updated kitchen back splash. You can see examples on the Charcoal Originals product page.
Q: Can Wallplanks be installed on ceilings?
A:Yes, Wallplanks can be installed on ceilings. Our Wallplanks are one of the best products you can use for wall panel ceiling applications. Wallplanks are light weight, thin and very easy to apply. Just peel and stick to the ceiling, and then use brad nails as reinforcement per the installation instructions. There is no need to hold the plank in place while trying to nail because the pre-applied adhesive eliminates that headache.
Q: Can Wallplanks be installed around a round corner so they meet at a 90-degree angle? If so, how?
A:It depends on how round your corner is. If it is not too round, you can accomplish this by installing trim! What you can do is measure the corner to verify.
- 1. To measure, take a straight edge and put if flat to one of the walls so it is hanging at least 2” over the edge.
- 2. Then, take either a ruler or a tape measure and put it flat to the other wall.
- 3. Measure the distance from the end of the rounded wall to the 90-degree meeting point of the straight edge & ruler/tape measure. Please note this measurement and keep it handy. If the measurement is less than 1.25” then you should be able to accomplish this by installing two trim pieces on each wall.
- 4. When installing the trim, make sure you use the measurement you made note of to know how far into the trim piece you should nail. This is to ensure that you are nailing the trim down into the actual wall.
Q: Can Wallplanks be installed on fireplace walls?
A: Follow local code. As long as the immediate surrounding of the fireplace opening is nonflammable Wallplanks can be installed on the sides of that, around and above.
Q: Can Wallplanks be installed in elevators?
A: Yes Wallplanks can be installed inside an elevator. As long as the elevator surface is flat, clean, and structurally sound. Be sure to follow the Wallplank installation instructions. The elevator needs to follow proper code in order to pass inspection.
Q: Will the planks hold up in high humid locations like lake communities without warping or changing?
A: Wallplanks are made from 100% wood and are designed for interior installations only. For best long-term performance permanent HVAC should be on and maintained with a relative humidity to the home or business between 30-55% for a minimum of 14 days prior to installation as well as during and after installation. If you suspect a change in humidity, allow ¼” expansion space for every 10’ of the wall on all sides. Additional nail down may be required for high humid locations.
Q: Can Wallplanks be installed outside?
A: No, Wallplanks cannot be installed in an outdoor setting. The veneer and HDF core is made from real wood and will therefore absorb moisture. Wallplanks are only approved for indoor installations.
What surfaces can Wallplanks adhere to?
Q: What kind of textured walls will Wallplanks adhere to?
A: It is recommended that all walls be tested with a sample prior to full installation. Heavy textured walls like knockdown or popcorn walls will require a skim coat application or sanding and scraping prior to installing Wallplanks. Ply wood and unfinished dry walls will require a coat of basic paint primer applied and dried first before installing Wallplanks.
All other textured walls like crows feet, orange peel, smooth or swirl should not require additional prep work.
Q: Can Wallplanks be installed on a cement or concrete surface?
A: Yes, Wallplanks can be installed on cement, a cinder block, or on a concrete surface. First you will need to either apply a coat of paint or primer sealer, or you can skim coat the wall, or sand and scrape the textured wall. Next make sure the surface is clean and dry. Once the surface is dry you can start installing Wallplanks according to the instructions.
Q: Can Wallplanks be installed over paneling?
A:Yes, Wallplanks will adhere to paneling. Wallplanks will adhere to a clean, dry andstructurally sound surface. It is recommended that all walls be tested with a sample prior to full installation. We also recommend using a brad nailer in addition to the pre-applied adhesive for this type of installation. The reason for this is the existing wood paneling will expand and contract as well as the Wallplanks and the additional reinforcements will keep all planks in place.
Q: Sub walls are to be flat, dry, structurally sound and clean prior to installing Wallplanks. Define dry?
A: Moisture content of the sub-wall that is plywood or drywall should not exceed 11% using a pin-style meter. If sub wall is concrete or cinder block it should be dry using an ASTM 1869-89 Calcium Chloride test with the moisture content not exceeding 2.0 lbs.
Q: Can Wallplanks be installed on ceramic tile?
A:Wallplanks can be installed on cleanceramic tile. Waxy, wet, dusty and dirty surfaces are the only surfaces that would cause adhesion issues.
Q: Can Wallplanks be installed over wallpaper?
A:Clean, Smooth, well-adhered wallpaper: This can be a base for Wallplanks. The installer must make sure the wallpaper is clean and firmly bonded to the wall before applying the wallplanks to the wallpaper.
Embossed wallpaper: The adhesive on the back of the wallplanks is 1/32" thick. If the embossing on the wallpaper raises out more than that it is possible that the Wallplanks adhesion will be interrupted every time it goes over the embossing. This could result in less than a firm bond. The installer will need to test bond strength with several Wallplanks to ensure adhesive bond strength to the embossed wallpaper before proceeding with the entire installation. If bond strength is not sufficient, the wallpaper will have to be removed prior to installing the wallplanks.
Textured wallpaper: should be removed and the base wall cleaned with trisodium phosphate ( TSP) before installing Wallplanks. To remove wallpaper there are steamers or wallpaper removal solutions available. These items plus the TSP cleaner are available in hardware stores or home centers.
Q: Can Wallplanks be installed over a mirrored surface?
A: Yes Wallplanks can be installed over a mirrored surface as long as the mirror is smooth, flat, structurally sound and cleaned prior to installation and a J-roller is used when applying the Wallplanks.
Installation Questions:
Q: Do Wallplanks need time to acclimate?
A:Per our installation instructions, to ensure proper adhesion and to avoid future movement such as gapping between boards and cracking on the face of the planks, permanent HVAC must be on and maintained between 60 ̊ - 75 ̊ F with relative humidity in the home between 30-55% for a minimum of 14 days before installation, as well as during and after installation. To accommodate for any changes in humidity, allow 1/4" expansion space for every 10' of the wall on all side. You do not have to acclimate the planks to the environment but you should acclimate the environment to be suitable for the installation of the planks. If you are concerned and would like extra assurance, you may use a nail gun and brad nails in addition to the pre-applied industrial strength adhesive on the back.
Q: What tools do I need for installing Wallplanks?
A: To install Wallplanks you will need a J-roller, TSP (trisodium phosphate) for cleaning sub wall, tape measure, 4' level, a straight edge, and a pencil. Possible cutting tools include hand saw, jig saw, or miter saw.
Q: How long does it take to install Wallplanks?
A: The length of time it takes to install Wallplanks depends on how big your wall is. A small accent wall would take no more than a few hours to complete. For larger walls, you could make a fun weekend project out of this!
Q: Which shiplap edge should be used?
A: Wallplanks have a shiplap edge on both sides of the planks. You can start installing on either shiplap side/edge.
Q: How do I install Wallplanks if my wall is uneven?
A: To install Wallplanks on an uneven surface you need to trace the uneven ceiling and or floor and rip cut your Wallplanks to fit the uneven surface.
Q: How do I cut Wallplanks to fit around an obstruction like a light switch, outlet, or vent?
A: Measure and trace the obstruction with a straight edge and pencil on the planks before removing the paper liner from the glue. Cut the traced obstruction space on the planks using a jig, hand or scroll saw. Place the cut Wallplanks over the obstruction to ensure a proper fit. Remove the release paper and install. Don't forget to use the J-roller.
Q: How do I stagger the Wallplanks?
A: See our image below on how to stagger the Wallplanks. The rule of thumb is 12" minimum offset. The goal is to not repeat or line up offset lines for at least every 3-4 rows. Try to avoid having boards that are shorter than 12" in your pattern.
Q: How can I install Wallplanks in a chevron pattern?
A: To install Wallplanks in a chevron pattern, simply cut each plank at the required angle for your installation and match the planks up.
Q: How can I install Wallplanks in a herringbone pattern?
A: When installing Wallplanks in a herringbone pattern, you need to evaluate where the shiplap edge should be cut and removed. You can remove the shiplap edge using a jig, hand or scroll saw. Cuts are generally made at a 45 degree angle. A helpful hint is to router the ends that don't butt up for a smoother installation. Once you have your starting point, continue to add boards to the wall working your way outward. Once you finally get to the corners, you can use your scrap pieces.
Q: Can Wallplanks be installed vertically?
A: Yes! Simply follow the same instructions, but begin your starting line vertically instead!
General Questions:
Q: What makes From The Forest Wallplanks innovative/ better than our competitors?
A:
1. Engineered from 100% REAL WOOD
2. Engineered with "Wall Flex," an HDF core and completed with a front and back face veneer that is finished with WearMax- making the planks both DURABLE & FLEXIBLE
4. Engineered with a SHIPLAP EDGE so the surface behind the planks does not peek through regardless of a change in seasons and humidity.
5.Proudly MADE IN THE USA - Central Wisconsin by From The Forest
Q: What are the advantages of the Reclaimed Collection in comparison to Stikwood?
1.) Our adhesive is stronger. Stikwood uses a 3M tape. We have used and tested this tape and have seen it fail time and time again. Our VacuuBond pre-applied adhesive on the back of our Wallplanks has been so successful on wall paneling, it is now also available on our engineered flooring. Installation time is less, just remove a single piece of release paper compared to the 3 strips that cover the tape. (https://vacuubond.com/)
2.) Our planks are hand crafted and hand finished in Wausau, Wisconsin
3.) We profile the shiplap edge so the planks interlock with each other. This prevents any gaps from occurring between the planks if expansion or contraction were to occur.
4.) This product is UV cured which is a very effective cleaning procedure along with the fact that it prevents the product from fading, stains and wear.
5.) 100% environmentally friendly and made in the USA
Q: Are Reclaimed Wallplanks California CARB compliant?
A:Yes, Reclaimed Wallplanks are also California CARB compliant with zero VOC's, from a NAF (no added formaldehyde) facility, and all raw materials are sourced from FSC (forest stewardship council) certified sawmills. We use top coats and stains that are water-based and UV cured to protect air quality. Our adhesives meet the highest standards for air emissions and we are TSCA Title VI compliant. There is no added formaldehyde to any of our products.
Q: What is the average length of the Reclaimed Wallplanks?
A:ARB come in lengths anywhere between 12"-47" with over 50% of the boards in a carton being the full 47" length.
Q: Can I purchase a half carton of Reclaimed Wallplanks?
A: We do not offer half carton options, however, we do offer individual full length boards 1.66 sq. ft. (5.1 W" x 47" L ) for $29.90 per board. Please note discounts do not apply towards single board purchases. Free shipping is still available only if purchased with a full carton order.
Q: What is your standard shipping and lead time?
A: The standard lead time from the date of purchase is 7-10 business days via UPS. Orders are processed within 2-3 business days and free shipping delivers within 5-7 business days. Please note we have no control over small parcel & LTL carrier delays due to increased shipping demands and reduced capacity.
- *UPS is environmentally friendly and ships Carbon Neutral
*Please note that some products are in high demand and may be on backorder. If you are concerned about meeting a deadline, please call us to check inventory and lead time.
*If you need to expedite an order there will be an additional fee associated with expediting. When expediting an order, please call us so we can do our best to accommodate.
*All Canadian shipments are subject to broker fees, duties and applicable taxes.
Q: What is the radius the boards can flex?
A: Reclaimed Wallpalnk boards have a built-in feature called "Wall Flex" that helps each board to contour to slightly out of flat walls. The product is notdesigned to flex around or over architecturally contoured or curved walls.
Q: What smoke and flaming rating are Wallplanks?
A: Our Wallplanks are rated Class C for surface burning characteristics of building materials. This means the flame spread index tested at 200 and smoke developed index tested at 150. Click here to view our Smoke and Flame Rating Certificate.
Q: Can Reclaimed Wallplanks be painted?
A:No, our Reclaimed Wallplanks are pre-finished and cannot be painted. We offer 3 Wallplank Originals SKU's that are unfinished and can be painted. The unfinished SKU's are Unfinished White Oak, Unfinished Walnut and Unfinished Maple.
Q: My Reclaimed planks are omitting an odor. What is this smell and what can I try to dissipate the odor?
A:The odor is from the actual aged, weathered, authentic barnwood planks and not from the restoration process. Our Wallplanks are 100% chemical free, zero VOC's, and has clear coat finish that is applied on top of the oil base color.
Here are some home remedies to try to eliminate the odor:
- Leave out a few bowls of vinegar
- Leave out several opened bags of charcoal
- Leave out a few bowls of baking soda
- Try Release spray. This should be found at your local hardware store
Q: Are Wallplanks sound proof?
A: No, Wallplanks have not been tested to be sound proof. Wallplanks are acoustic dampening if an item were to hit the wall, similar to high heels on a hardwood floor, but no further testing or information is available regarding soundproofing.
Q: Can I hang mirrors and artwork on the Reclaimed Wallplanks?
A: Wallplanks are not load bearing. Wall Décor like mirrors, pictures, shelves can be mounted by drilling through the planks provided the underlying wall provides sufficient support (i.e. wall studs). Use proper hardware to install any wall décor.
Q: How do I remove excess adhesive on the Wallplank veneer?
A: To remove excess adhesive from the Wallplank veneer simply use goo gone!
Q: Are additional reinforcements (ie: nails) required when installing Reclaimed Wallplanks?
A: No, additional reinforcements are not required when installing Wallplanks as long as the installation instructions are followed. We have 100% confidence in the strength of our VacuuBond adhesive. If you elect to use nails as added protection when adhering your planks to the wall, any nails that come in contact with a stud would be more secure than nails that do not come in contact with a stud.
Q: How do I replace a board on my wall?
A:
1. Starting with an end of row plank, remove the wall planks up to the one that needs to be replaced
2. Remove the bad plank
3. Trim off the profile of the boards before replacing
4. Use either gorilla glue or nail planks back in place
Q: Are Reclaimed Wallplanks removable?
A: Wallplanks are meant to be a permanent update to your walls. If you choose to remove the planks they could leave some damage to the wall underneath and/or cause paint chipping. The damage that is caused is not substantial and can be repaired easily with skim coating or spackle.
Q: How do I remove Reclaimed Wallplanks?
A: To remove the planks you will need a putty knife or scraping tool, a heating device such as a hair dryer or heat gun, sand paper, cloth, water and TSP.
Step 1: Use the heating tool on high heat while using the putty knife to slowlyremove the plank from the wall. The heat will soften the adhesive and the putty knife will help scrape behind it to remove it. Do not move to quickly when removing otherwise the plank may snap.
*please note that the plank may cause some damage to the underlying wall and cause the paint to chip due to the strength of the adhesive.
Step 2: Use the putty knife to remove any excessive adhesive from the wall. The heating tool may also be helpful during this step
Step 3: Use the sand paper to smooth any damaged surface/ chipped paint
Step 4: Clean the wall with TSP and allow to dry completely
Q: Why are my Reclaimed Wallplanks not sticking to the wall?
A: We are 100% confident in the strength of the VacuuBond adhesive and have not had any issues to date that have not been related to pre-installation sub wall preparation or failure to use a J-roller. Below is a list of a few reasons why this could be happening:
1. If a J-Roller was not used immediately after installing every plank on the wall, the adhesive did not get the opportunity to adhere to the sub-wall. VacuuBond adhesive is time and pressure sensitive industrial strength adhesive and a J-Roller is a very crucial step during the installation process.
2. If the sub-wall is not cleaned with TSP prior to your installation, there could but dirt, dust, grease or grime that is making it difficult for the adhesive to adhere to the wall.
3. If the sub-wall is not completely dry prior to your installation, the adhesive will not adhere properly to the wall.
4. If the sub wall that you applied your planks to has a heavy texture, the planks may not adhere well. Surfaces with a heavy texture must either be sanded, or skim coated and primed prior to installation to avoid adhesion issues. If you are installing on ply wood, or unfinished drywall, those surfaces should have been primed prior to installation.
5. If the sub wall that you applied your planks to is not structurally sound, the adhesive may not adhere well.
6. If permanent HVAC is not maintained between 60 degrees and 75 degrees with a relative humidity between 30-55% for a minimum of 14 days prior to installation as well as during installation to insure proper adhesion.
Solutions:
1. Secure the planks that are releasing by using a brad nail and a bit of filler putty or a furniture marker to blend in over the nails.
2. Secure the planks using another commercially available adhesive such as Liquid Nails, or Gorilla Glue to adhere the planks where they have released. Make sure to apply pressure for a good amount of time so the adhesive can properly bond.
Q: Does the VacuuBond adhesive have a vapor barrier?
A: VacuuBond does not have a vapor barrier, but we do sell a membrane primer which does have a vapor barrier.
Q: Do you ship to Canada?
A: Yes, we do ship to Canada, however free shipping does not apply. The purchaser is the responsible party for all shipping costs, taxes, and duties.
How do I measure SQ. FT.?
Q: How do I calculate square footage of my wall?
A: Take the base of your wall times the height of your wall to get total square feet.
Q: How do I calculate square footage for a triangular area?
A: Measure the length of the base of the triangle and the height of the triangle. To calculate the area of the triangle use the formula: (base x height) / 2. Multiply the base by the height and then divide it by 2.
Where can Reclaimed Wallplanks be installed?
Q: Can Reclaimed Wallplanks be installed in bathrooms?
A:Yes, Reclaimed Wallplanks can be installed in a full bathroom. Additional nail down may be required.
Q: Can Reclaimed Wallplanks be installed inside shower walls?
A: No, Wallplanks should not be installed inside shower walls. Wallplanks are made from real engineered hardwood and are not waterproof.
Q: Can Reclaimed Wallplanks be installed on ceilings?
A:Yes, Wallplanks can be installed on ceilings. Our Wallplanks are one of the best products you can use for wall panel ceiling applications. Wallplanks are light weight, thin and very easy to apply. Just peel and stick to the ceiling, and then use brad nails as reinforcement per the installation instructions. There is no need to hold the plank in place while trying to nail because the pre-applied adhesive eliminates that headache.
Q: Can Wallplanks be installed around a round corner so they meet at a 90-degree angle? If so, how?
A:It depends on how round your corner is. If it is not too round, you can accomplish this by installing trim! What you can do is measure the corner to verify.
- 1. To measure, take a straight edge and put if flat to one of the walls so it is hanging at least 2” over the edge.
- 2. Then, take either a ruler or a tape measure and put it flat to the other wall.
- 3. Measure the distance from the end of the rounded wall to the 90-degree meeting point of the straight edge & ruler/tape measure. Please note this measurement and keep it handy. If the measurement is less than 1.25” then you should be able to accomplish this by installing two trim pieces on each wall.
- 4. When installing the trim, make sure you use the measurement you made note of to know how far into the trim piece you should nail. This is to ensure that you are nailing the trim down into the actual wall.
Q: Will the planks hold up in high humid locations like lake communities without warping or changing?
A: Reclaimed Wallplanks are made from 100% wood and are designed for interior installations only. For best long-term performance permanent HVAC should be on and maintained with a relative humidity to the home or business between 30-55% for a minimum of 14 days prior to installation as well as during and after installation. If you suspect a change in humidity, allow ¼” expansion space for every 10’ of the wall on all sides. Additional nail down may be required for high humid locations.
Q: Can Reclaimed Wallplanks be installed outside?
A: No, Wallplanks cannot be installed in an outdoor setting. The veneer and HDF core is made from real wood and will therefore absorb moisture. Wallplanks are only approved for indoor installations.
What surfaces can Reclaimed Wallplanks adhere to?
Q: What kind of textured walls will Reclaimed Wallplanks adhere to?
A:It is recommended that all walls be tested with a sample prior to full installation. Heavy textured walls like knockdown or popcorn walls will require a skim coat application or sanding and scraping prior to installing Wallplanks. Ply wood and unfinished dry walls will require a coat of basic paint primer applied and dried first before installing Wallplanks.
All other textured walls like crows feet, orange peel, smooth or swirl will should not require additional prep work.
Q: Can Wallplanks be installed on a cement or concrete surface?
A: Yes, Wallplanks can be installed on cement, a cinder block, or on a concrete surface. First you will need to either apply a coat of paint or primer sealer, or you can skim coat the wall, or sand and scrape the textured wall. Next make sure the surface is clean and dry. Once the surface is dry you can start installing Wallplanks according to the instructions.
Q: Can Wallplanks be installed over paneling?
A:Yes, Wallplanks will adhere to paneling. Wallplanks will adhere to a clean, dry andstructurally sound surface. It is recommended that all walls be tested with a sample prior to full installation. We also recommend using a brad nailer in addition to the pre-applied adhesive for this type of installation. The reason for this is the existing wood paneling will expand and contract as well as the Wallplanks and the additional reinforcements will keep all planks in place.
Q: Sub walls are to be flat, dry, structurally sound and clean prior to installing Wallplanks. Define dry?
A: Moisture content of the sub-wall that is plywood or drywall should not exceed 11% using a pin-style meter. If sub wall is concrete or cinder block it should be dry using an ASTM 1869-89 Calcium Chloride test with the moisture content not exceeding 2.0 lbs. Concrete or block should also be primed or painted prior to installation for tape adhesion.
Q: Can Reclaimed Wallplanks be installed on ceramic tile?
A:Wallplanks can be installed on cleanceramic tile. Waxy, wet, dusty and dirty surfaces are the only surfaces that would cause adhesion issues.
Q: Can Reclaimed Wallplanks be installed over wallpaper?
A:Clean, Smooth, well-adhered wallpaper:This can be a base for the planks. The installer must make sure the wallpaper is clean and firmly bonded to the wall before applying the planks to the wallpaper.
Embossed wallpaper: The adhesive on the back of the planks is 1/32" thick. If the embossing on the wallpaper raises out more than that it is possible that the plank adhesion will be interrupted every time it goes over the embossing. This could result in less than a firm bond. The installer will need to test bond strength with several planks to ensure adhesive bond strength to the embossed wallpaper before proceeding with the entire installation. If bond strength is not sufficient, the wallpaper will have to be removed prior to installing the planks.
Textured wallpaper: should be removed and the base wall cleaned with trisodium phosphate ( TSP) before installing ARB. To remove wallpaper there are steamers or wallpaper removal solutions available. These items plus the TSP cleaner are available in hardware stores or home centers.
Q: Can Wallplanks be installed over a mirrored surface?
A: Yes Wallplanks can be installed over a mirrored surface as long as the mirror is smooth, flat, structurally sound and cleaned prior to installation and a J-roller is used when applying the Wallplanks.
Installation Questions:
Q: Do Wallplanks need time to acclimate?
A:Per our installation instructions, to ensure proper adhesion and to avoid future movement such as gapping between boards and cracking on the face of the planks, permanent HVAC must be on and maintained between 60 ̊ - 75 ̊ F with relative humidity in the home between 30-55% for a minimum of 14 days before installation, as well as during and after installation. To accommodate for any changes in humidity, allow 1/4" expansion space for every 10' of the wall on all side. You do not have to acclimate the planks to the environment but you should acclimate the environment to be suitable for the installation of the planks. If you are concerned and would like extra assurance, you may use a nail gun and brad nails in addition to the pre-applied industrial strength adhesive on the back.
Q: What tools do I need for installing Wallplanks?
A: To install Wallplanks you will need a J-roller, TSP (trisodium phosphate) for cleaning sub wall, tape measure, 4' level, a straight edge, and a pencil. Possible cutting tools include hand saw, jig saw, or miter saw.
Q: How long does it take to install Wallplanks?
A: The length of time it takes to install Wallplanks depends on how big your wall is. A small accent wall would take no more than a few hours to complete. For larger walls, you could make a fun weekend project out of this!
Q: Which shiplap edge should be used?
A: Wallplanks have a shiplap edge on both sides of the planks. You can start installing on either shiplap side/edge.
Q: How do I install Wallplanks if my wall is uneven?
A: To install Wallplanks on an uneven surface you need to trace the uneven ceiling and or floor and rip cut your Wallplanks to fit the uneven surface.
Q: How do I cut Wallplanks to fit around an obstruction like a light switch, outlet, or vent?
A: Measure and trace the obstruction with a straight edge and pencil on the planks before removing the paper liner from the glue. Cut the traced obstruction space on the planks using a jig, hand or scroll saw. Place the cut Wallplanks over the obstruction to ensure a proper fit. Remove the release paper and install. Don't forget to use the J-roller.
Q: How do I stagger the Wallplanks?
A: See our image below on how to stagger the Wallplanks. The rule of thumb is 12" minimum offset. The goal is to not repeat or line up offset lines for at least every 3-4 rows. Try to avoid having boards that are shorter than 12" in your pattern.
Q: How can I install Wallplanks in a chevron pattern?
A: To install Wallplanks in a chevron pattern, simply cut each plank at the required angle for your installation and match the planks up.
Q: How can I install Wallplanks in a herringbone pattern?
A: When installing Wallplanks in a herringbone pattern, you need to evaluate where the shiplap edge should be cut and removed. You can remove the shiplap edge using a jig, hand or scroll saw. Cuts are generally made at a 45 degree angle. A helpful hint is to router the ends that don't butt up for a smoother installation. Once you have your starting point, continue to add boards to the wall working your way outward. Once you finally get to the corners, you can use your scrap pieces.
Q: Can Wallplanks be installed vertically?
A: Yes! Simply follow the same instructions, but begin your starting line vertically instead!
General Questions:
Q: What makes From The Forest Wallplanks innovative/ better than our competitors?
A:
1. Engineered from 100% REAL WOOD
2. Engineered with "Wall Flex," an HDF core and completed with a front and back face veneer that is finished with WearMax- making the planks both DURABLE & FLEXIBLE
4. Engineered with a SHIPLAP EDGE so the surface behind the planks does not peek through regardless of a change in seasons and humidity.
5.Proudly MADE IN THE USA - Central Wisconsin by From The Forest
Q: What are the advantages of the Dimensions Collection in comparison to Stikwood?
1.) This product is far more durable and is even slightly flexible due to the fact that it is engineered. Those planks won't break easily.
2.) The VaccuBond pre-applied adhesive is far more advanced and successful than peel and stick 3M tape and it takes less installation time to remove one single piece of release paper compared to 3 strips for tape. (https://vacuubond.com/)
3.) This product is engineered in such a way that you can install in in 1D 2D or 3D! Here is a video that explains this further: https://youtu.be/n91NXbdB6oY
4.) No painting required! There are no holes in the planks so you do not have to paint the underlying wall prior to installation or use a touch up marker during installation.
5.) The surface is smooth and easy to clean.
6.) This product offers a laminate face that is more durable against scratches and wear.
7.) 100% environmentally friendly and made in the USA.
Q: What is HDF?
A: Also referred to as hardboard, a high-density fiberboard (HDF) is a type of engineered wood product. It's made from wood fiber extracted from chips and pulped wood waste. HDF is similar but much harder and denser than particle board or medium density fiberboard (MDF).
Q: What is veneer?
A: Wallplank veneer is a thin decorative covering of fine wood applied to the front face and the back face of our environmentally friendly HDF core.
Q: What is the average length of Wallplanks Dimensions?
A:Wallplank Dimensions come in (12) full length boards of 47".
Q: Can I purchase a half carton of Wallplanks?
A: We do not offer half carton options, however, we do offer individual full length boards 2.16 sq. ft. (6.5 W" x 47" L ) for $14.28 per board. Please note discounts do not apply to single board orders. Free shipping is still available only if purchased with a full carton order.
Q: What smoke and flaming rating are Wallplanks?
A: Our Wallplanks are rated Class C for surface burning characteristics of building materials. This means the flame spread index tested at 200 and smoke developed index tested at 150. Click here to view our Smoke and Flame Rating Certificate.
Q: What is the maximum heat the Wallplanks adhesive will withstand?
A: Wallplanks have been tested at temperatures of 140 degrees and the adhesive has stayed intact.
Q: Do you offer Class A fire rated Wallplanks?
A. Yes we do offer Class A fire rated Wallplanks for surface burning characteristics of building materials. Class A certified products have been tested and proven to hold up longer against flame spread. Cost is an additional $3.00/SF. Minimum order quantity is 10 cartons (255 SF). Estimated lead time is 3-6 weeks. (The three week lead time is based on From The Forest available stock. For large installations that exceed standard stock levels, assume 6-8 weeks). Please inquire with an expert to place this order. Click here for our procedure for Class A Fire Rating.
Q: Can Wallplank Dimensions be painted?
A:No, our Dimensions Wallplanks are pre-finished and cannot be painted. We offer 3 Wallplank Originals SKU's that are unfinished and can be painted. The unfinished SKU's are Unfinished White Oak, Unfinished Walnut and Unfinished Maple.
Q: Are Wallplanks sound proof?
A: No, Wallplanks have not been tested to be sound proof. Wallplanks are acoustic dampening if an item were to hit the wall, similar to high heels on a hardwood floor, but no further testing or information is available regarding soundproofing.
Q: Can I hang mirrors and artwork on the Wallplanks?
A: Wallplanks are not load bearing. Wall Décor like mirrors, pictures, shelves can be mounted by drilling through the Wallplanks provided the underlying wall provides sufficient support (i.e. wall studs). Use proper hardware to install any wall décor.
Q: How do I remove excess adhesive on the Wallplank veneer?
A: To remove excess adhesive from the Wallplank veneer simply use goo gone!
Finishing nails should only be used for wood subwalls.
Q: Why do some of my Wallplanks look like they have the same pattern?
A: On most Wallplank sku's there can be some pattern repeat in about every 16th board.
Reason: When From The Forestslices the veneer, the machine used to slice the veneer leaves a grain pattern that repeats. In addition, the staining process we are using to create color variation and saw marks can also repeat on every 12-16 boards. We do have a system in our production process to minimize the natural pattern repeat in the same carton but cannot eliminate the issue completely. For that reason, the Installation Instructions indicate that the planks should be "dry laid" prior to permanent installation.
Q: Are additional reinforcements (ie: nails) required when installing Wallplanks?
A: No, additional reinforcements are not required when installing Wallplanks as long as the installation instructions are followed. We have 100% confidence in the strength of our VacuuBond adhesive. If you elect to use nails as added protection when adhering your Wallplanks to the wall, any nails that come in contact with a stud would be more secure than nails that do not come in contact with a stud.
Q: How do I replace a board on my wall?
A:
1. Starting with an end of row plank, remove the wall planks up to the one that needs to be replaced
2. Remove the bad plank
3. Trim off the profile of the boards before replacing
4. Use either gorilla glue or nail planks back in place
Q: Are Wallplanks removable?
A: Wallplanks are meant to be a permanent update to your walls. If you choose to remove the Wallplanks they could leave some damage to the wall underneath and/or cause paint chipping. The damage that is caused is not substantial and can be repaired easily with skim coating or spackle.
Q: How do I remove Wallplanks?
A: To remove Wallplanks you will need a putty knife or scraping tool, a heating device such as a hair dryer or heat gun, sand paper, cloth, water and TSP.
Step 1: Use the heating tool on high heat while using the putty knife to slowlyremove the plank from the wall. The heat will soften the adhesive and the putty knife will help scrape behind it to remove it. Do not move to quickly when removing otherwise the plank may snap.
*please note that the plank may cause some damage to the underlying wall and cause the paint to chip due to the strength of the adhesive.
Step 2: Use the putty knife to remove any excessive adhesive from the wall. The heating tool may also be helpful during this step
Step 3: Use the sand paper to smooth any damaged surface/ chipped paint
Step 4: Clean the wall with TSP and allow to dry completely
Q: Why are my Wallplanks not sticking to the wall?
A: We are 100% confident in the strength of the VacuuBondadhesive and have not had any issues to date that have not been related to pre-installation sub wall preparation or failure to use a J-roller. Below is a list of a few reasons why this could be happening:
1. If a J-Roller was not used immediately after installing every plank on the wall, the adhesive did not get the opportunity to adhere to the sub-wall. VacuuBond adhesive is time and pressure sensitive industrial strength adhesive and a J-Roller is a very crucial step during the installation process.
2. If the sub-wall is not cleaned with TSP prior to your installation, there could but dirt, dust, grease or grime that is making it difficult for the adhesive to adhere to the wall.
3. If the sub-wall is not completely dry prior to your installation, the adhesive will not adhere properly to the wall.
4. If the sub wall that you applied your Wallplanks to has a heavy texture, the planks may not adhere well. Surfaces with a heavy texture must either be sanded, or skim coated and primed prior to installation to avoid adhesion issues. If you are installing on ply wood, or unfinished drywall, those surfaces should have been primed prior to installation.
5. If the sub wall that you applied your Wallplanks to is not structurally sound, the adhesive may not adhere well.
6. If permanent HVAC is not maintained between 60 degrees and 75 degrees with a relative humidity between 30-55% for a minimum of 14 days prior to installation as well as during installation to insure proper adhesion.
Solutions:
1. Secure the planks that are releasing by using a brad nail and a bit of filler putty or a furniture marker to blend in over the nails.
2. Secure the planks using another commercially available adhesive such as Liquid Nails, or Gorilla Glue to adhere the planks where they have released. Make sure to apply pressure for a good amount of time so the adhesive can properly bond.
Q: Do you ship to Canada?
A: Yes, we do ship to Canada, however free shipping does not apply. The purchaser is the responsible party for all shipping costs, taxes, and duties.
How do I measure SQ. FT.?
Q: How do I calculate square footage of my wall?
A: Take the base of your wall times the height of your wall to get total square feet.
Q: How do I calculate square footage for a triangular area?
A: Measure the length of the base of the triangle and the height of the triangle. To calculate the area of the triangle use the formula: (base x height) / 2. Multiply the base by the height and then divide it by 2.
Where can Wallplanks be installed?
Q: Can Wallplanks be installed in bathrooms?
A:Yes, Wallplanks can be installed in a full bathroom. Additional nail down may be required.
Q: Can Wallplanks be installed inside shower walls?
A: No, Wallplanks should not be installed inside shower walls. Wallplanks are made from real engineered hardwood and are not waterproof.
Q: Can Wallplanks be installed as kitchen back splash?
A: Yes, Wallplanks make a beautiful updated kitchen back splash. You can see examples on the Driftscape Dimensions product page.
Q: Can Wallplanks be installed on ceilings?
A:Yes, Wallplanks can be installed on ceilings. Our Wallplanks are one of the best products you can use for wall panel ceiling applications. Wallplanks are light weight, thin and very easy to apply. Just peel and stick to the ceiling, and then use brad nails as reinforcement per the installation instructions. There is no need to hold the plank in place while trying to nail because the pre-applied adhesive eliminates that headache.
Q: Can Wallplanks be installed around a round corner so they meet at a 90-degree angle? If so, how?
A:It depends on how round your corner is. If it is not too round, you can accomplish this by installing trim! What you can do is measure the corner to verify.
- 1. To measure, take a straight edge and put if flat to one of the walls so it is hanging at least 2” over the edge.
- 2. Then, take either a ruler or a tape measure and put it flat to the other wall.
- 3. Measure the distance from the end of the rounded wall to the 90-degree meeting point of the straight edge & ruler/tape measure. Please note this measurement and keep it handy. If the measurement is less than 1.25” then you should be able to accomplish this by installing two trim pieces on each wall.
- 4. When installing the trim, make sure you use the measurement you made note of to know how far into the trim piece you should nail. This is to ensure that you are nailing the trim down into the actual wall.
Q: Can Wallplanks be installed on fireplace walls?
A: Follow local code. As long as the immediate surrounding of the fireplace opening is nonflammable Wallplanks can be installed on the sides of that, around and above.
Q: Can Wallplanks be installed in elevators?
A: Yes Wallplanks can be installed inside an elevator. As long as the elevator surface is flat, clean, and structurally sound. Be sure to follow the Wallplank installation instructions. The elevator needs to follow proper code in order to pass inspection.
Q: Will the planks hold up in high humid locations like lake communities without warping or changing?
A: Wallplanks are made from 100% wood and are designed for interior installations only. For best long-term performance permanent HVAC should be on and maintained with a relative humidity to the home or business between 30-55% for a minimum of 14 days prior to installation as well as during and after installation. If you suspect a change in humidity, allow ¼” expansion space for every 10’ of the wall on all sides. Additional nail down may be required for high humid locations.
Q: Can Wallplanks be installed outside?
A: No, Wallplanks cannot be installed in an outdoor setting. The HDF core is made from real wood and will therefore absorb moisture. Wallplanks are only approved for indoor installations.
What surfaces can Wallplanks adhere to?
Q: What kind of textured walls will Wallplanks adhere to?
A:It is recommended that all walls be tested with a sample prior to full installation. Heavy textured walls like knockdown or popcorn walls will require a skim coat application or sanding and scraping prior to installing Wallplanks. Ply wood and unfinished dry walls will require a coat of basic paint primer applied and dried first before installing Wallplanks.
All other textured walls like crows feet, orange peel, smooth or swirl will should not require additional prep work.
Q: Can Wallplanks be installed on a cement or concrete surface?
A: Yes, Wallplanks can be installed on cement, a cinder block, or on a concrete surface. First you will need to either apply a coat of paint or primer sealer, or you can skim coat the wall, or sand and scrape the textured wall. Next make sure the surface is clean and dry. Once the surface is dry you can start installing Wallplanks according to the instructions.
Q: Can Wallplanks be installed over paneling?
A:Yes, Wallplanks will adhere to paneling. Wallplanks will adhere to a clean, dry andstructurally sound surface. It is recommended that all walls be tested with a sample prior to full installation. We also recommend using a brad nailer in addition to the pre-applied adhesive for this type of installation. The reason for this is the existing wood paneling will expand and contract as well as the Wallplanks and the additional reinforcements will keep all planks in place.
Q: Sub walls are to be flat, dry, structurally sound and clean prior to installing Wallplanks. Define dry?
A: Moisture content of the sub-wall that is plywood or drywall should not exceed 11% using a pin-style meter. If sub wall is concrete or cinder block it should be dry using an ASTM 1869-89 Calcium Chloride test with the moisture content not exceeding 2.0 lbs. Concrete or block should also be primed or painted prior to installation for tape adhesion.
Q: Can Wallplanks be installed on ceramic tile?
A:Wallplanks can be installed on cleanceramic tile. Waxy, wet, dusty and dirty surfaces are the only surfaces that would cause adhesion issues.
Q: Can Wallplanks be installed over wallpaper?
A:Clean, Smooth, well-adhered wallpaper: This can be a base for Wallplanks. The installer must make sure the wallpaper is clean and firmly bonded to the wall before applying the wallplanks to the wallpaper.
Embossed wallpaper: The adhesive on the back of the wallplanks is 1/32" thick. If the embossing on the wallpaper raises out more than that it is possible that the Wallplanks adhesion will be interrupted every time it goes over the embossing. This could result in less than a firm bond. The installer will need to test bond strength with several Wallplanks to ensure adhesive bond strength to the embossed wallpaper before proceeding with the entire installation. If bond strength is not sufficient, the wallpaper will have to be removed prior to installing the wallplanks.
Textured wallpaper: should be removed and the base wall cleaned with trisodium phosphate ( TSP) before installing Wallplanks. To remove wallpaper there are steamers or wallpaper removal solutions available. These items plus the TSP cleaner are available in hardware stores or home centers.
Q: Can Wallplanks be installed over a mirrored surface?
A: Yes Wallplanks can be installed over a mirrored surface as long as the mirror is smooth, flat, structurally sound and cleaned prior to installation and a J-roller is used when applying the Wallplanks.
Installation Questions:
Q: Do Wallplanks need time to acclimate?
A:Per our installation instructions, to ensure proper adhesion and to avoid future movement such as gapping between boards and cracking on the face of the planks, permanent HVAC must be on and maintained between 60 ̊ - 75 ̊ F with relative humidity in the home between 30-55% for a minimum of 14 days before installation, as well as during and after installation. To accommodate for any changes in humidity, allow 1/4" expansion space for every 10' of the wall on all side. You do not have to acclimate the planks to the environment but you should acclimate the environment to be suitable for the installation of the planks. If you are concerned and would like extra assurance, you may use a nail gun and brad nails in addition to the pre-applied industrial strength adhesive on the back.
Q: What tools do I need for installing Wallplanks?
A: To install Wallplanks you will need a J-roller, TSP (trisodium phosphate) for cleaning sub wall, tape measure, 4' level, a straight edge, and a pencil. Possible cutting tools include hand saw, jig saw, or miter saw.
Q: How long does it take to install Wallplanks?
A: The length of time it takes to install Wallplanks depends on how big your wall is. A small accent wall would take no more than a few hours to complete. For larger walls, you could make a fun weekend project out of this!
Q: Which shiplap edge should be used?
A: Wallplanks have a shiplap edge on both sides of the planks. You can start installing on either shiplap side/edge.
Q: How do I install Wallplanks if my wall is uneven?
A: To install Wallplanks on an uneven surface you need to trace the uneven ceiling and or floor and rip cut your Wallplanks to fit the uneven surface.
Q: How do I cut Wallplanks to fit around an obstruction like a light switch, outlet, or vent?
A: Measure and trace the obstruction with a straight edge and pencil on the planks before removing the paper liner from the glue. Cut the traced obstruction space on the planks using a jig, hand or scroll saw. Place the cut Wallplanks over the obstruction to ensure a proper fit. Remove the release paper and install. Don't forget to use the J-roller.
Q: How do I stagger the Wallplanks?
A: See our image below on how to stagger the Wallplanks. The rule of thumb is 12" minimum offset. The goal is to not repeat or line up offset lines for at least every 3-4 rows. Try to avoid having boards that are shorter than 12" in your pattern.
Q: How can I install Wallplanks in a chevron pattern?
A: To install Wallplanks in a chevron pattern, simply cut each plank at the required angle for your installation and match the planks up.
Q: How can I install Wallplanks in a herringbone pattern?
A: When installing Wallplanks in a herringbone pattern, you need to evaluate where the shiplap edge should be cut and removed. You can remove the shiplap edge using a jig, hand or scroll saw. Cuts are generally made at a 45 degree angle. A helpful hint is to router the ends that don't butt up for a smoother installation. Once you have your starting point, continue to add boards to the wall working your way outward. Once you finally get to the corners, you can use your scrap pieces.
General Questions:
Q: What makes From The Forest Wallplanks innovative/ better than our competitors?
A:
1. Engineered from 100% REAL WOOD
2. Engineered with "Wall Flex," an HDF core and completed with a front and back face veneer that is finished with WearMax- making the planks both DURABLE & FLEXIBLE
4. Engineered with a SHIPLAP EDGE so the surface behind the planks does not peek through regardless of a change in seasons and humidity.
5.Proudly MADE IN THE USA - Central Wisconsin by From The Forest
Q: What is HDF?
A: Also referred to as hardboard, a high-density fiberboard (HDF) is a type of engineered wood product. It's made from wood fiber extracted from chips and pulped wood waste. HDF is similar but much harder and denser than particle board or medium density fiberboard (MDF).
Q: What is veneer?
A: The veneer is a thin decorative covering of fine wood applied to the front face and the back face of our environmentally friendly HDF core.
Q: What is the average length of Classic Shiplap?
A:A carton ofClassic Shiplap will contain 26.4sf of material. There are 11 boards per carton. 80% of the carton will contain 46.5" full length boards and up to 20% random length boards.
Q: Can I purchase a half carton of Classic Shiplap?
A: We do not offer half carton options, however, we do offer individual full length boards 2.40 sq. ft. (7.44 W" x 46.5" L ) for $19.20 per board. Please note discounts do not apply towards single board purchases. Free shipping is still available only if purchased with a full carton order.
Q: What is your standard shipping and lead time?
A: The standard lead time from the date of purchase is 7-10 business days via UPS. Orders are processed within 2-3 business days and free shipping delivers within 5-7 business days. Please note we have no control over small parcel & LTL carrier delays due to increased shipping demands and reduced capacity.
- *UPS is environmentally friendly and ships Carbon Neutral
*Please note that some products are in high demand and may be on backorder. If you are concerned about meeting a deadline, please call us to check inventory and lead time.
*If you need to expedite an order there will be an additional fee associated with expediting. When expediting an order, please call us so we can do our best to accommodate.
*All Canadian shipments are subject to broker fees, duties and applicable taxes.
Q: What are the differences between the White Classic Shiplap and Alabaster Originals?
A:The Classic Shiplap has a bright, clean, white vinyl wrapped face on an HDF core. These planks are 7.44" W and have the true nickle gap shiplap profile.
The Alabaster Originals has an engineered hardwood veneer on an HDF core. You will see the natural grain of the wood behind the white face. These planks are 5.1" W and have an interlocking joint profile.
Both options are peel and stick with our pre-applied adhesive.
Q: What is the radius the boards can flex?
A: Classic Shiplap boards have a built-in feature called "Wall Flex" that helps each board to contour to slightly out of flat walls. The product is notdesigned to flex around or over architecturally contoured or curved walls.
Q: What is the maximum heat the Classic Shiplap adhesive will withstand?
A: Wallplanks have been tested at temperatures of 140 degrees and the adhesive has stayed intact.
Q: Can Classic Shiplap Wallplanks be painted?
A:Yes, our White Classic Shiplap Wallplanks are paintable. The best one step application paint to use is an acrylic or acrylic latex paint. Be sure to read the label for vinyl or PVC surface compatibility. Oil based paints will work as well, just follow the instructions for application. We also offer 3 Wallplank Originals SKU's that are unfinished and can be painted. The unfinished SKU's are Unfinished White Oak, Unfinished Walnut and Unfinished Maple.
Q: Are Wallplanks sound proof?
A: No, Wallplanks have not been tested to be sound proof. Wallplanks are acoustic dampening if an item were to hit the wall, similar to high heels on a hardwood floor, but no further testing or information is available regarding soundproofing.
Q: Can I hang mirrors and artwork on the Classic Shiplap?
A: Classic Shiplap planks are not load bearing. Wall Décor like mirrors, pictures, shelves can be mounted by drilling through the planks provided the underlying wall provides sufficient support (i.e. wall studs). Use proper hardware to install any wall décor.
Q: How do I remove excess adhesive on the Wallplank veneer?
A: To remove excess adhesive from the Wallplank veneer simply use goo gone!
Q: Are additional reinforcements (ie: nails) required when installing Classic Shiplap?
A: No, additional reinforcements are not required when installing Classic Shiplap as long as the installation instructions are followed. We have 100% confidence in the strength of our VacuuBond adhesive. If you elect to use nails as added protection when adhering your Classic Shiplap to the wall, any nails that come in contact with a stud would be more secure than nails that do not come in contact with a stud.
Q: How do I replace a board on my wall?
A:
1. Starting with an end of row plank, remove the wall planks up to the one that needs to be replaced
2. Remove the bad plank
3. Trim off the profile of the boards before replacing
4. Use either gorilla glue or nail planks back in place
Q: Are Classic Shiplap planksremovable?
A: Classic Shiplap planks are meant to be a permanent update to your walls. If you choose to remove the Classic Shiplap they could leave some damage to the wall underneath and/or cause paint chipping. The damage that is caused is not substantial and can be repaired easily with skim coating or spackle.
Q: How do I remove Classic Shiplap planks?
A: To remove Classic Shiplap planks you will need a putty knife or scraping tool, a heating device such as a hair dryer or heat gun, sand paper, cloth, water and TSP.
Step 1: Use the heating tool on high heat while using the putty knife to slowlyremove the plank from the wall. The heat will soften the adhesive and the putty knife will help scrape behind it to remove it. Do not move to quickly when removing otherwise the plank may snap.
*please note that the plank may cause some damage to the underlying wall and cause the paint to chip due to the strength of the adhesive.
Step 2: Use the putty knife to remove any excessive adhesive from the wall. The heating tool may also be helpful during this step
Step 3: Use the sand paper to smooth any damaged surface/ chipped paint
Step 4: Clean the wall with TSP and allow to dry completely
Q: Why are my Classic Shiplap planks not sticking to the wall?
A: We are 100% confident in the strength of the VacuuBond adhesive and have not had any issues to date that have not been related to pre-installation sub wall preparation or failure to use a J-roller. Below is a list of a few reasons why this could be happening:
1. If a J-Roller was not used immediately after installing every plank on the wall, the adhesive did not get the opportunity to adhere to the sub-wall. VacuuBond adhesive is time and pressure sensitive industrial strength adhesive and a J-Roller is a very crucial step during the installation process.
2. If the sub-wall is not cleaned with TSP prior to your installation, there could but dirt, dust, grease or grime that is making it difficult for the adhesive to adhere to the wall.
3. If the sub-wall is not completely dry prior to your installation, the adhesive will not adhere properly to the wall.
4. If the sub wall that you applied your Classic Shiplap planks to has a heavy texture, the planks may not adhere well. Surfaces with a heavy texture must either be sanded, or skim coated and primed prior to installation to avoid adhesion issues. If you are installing on ply wood, or unfinished drywall, those surfaces should have been primed prior to installation.
5. If the sub wall that you applied your Classic Shiplap planks to is not structurally sound, the adhesive may not adhere well.
6. If permanent HVAC is not maintained between 60 degrees and 75 degrees with a relative humidity between 30-55% for a minimum of 14 days prior to installation as well as during installation to insure proper adhesion.
Solutions:
1. Secure the planks that are releasing by using a brad nail and a bit of filler putty or a furniture marker to blend in over the nails.
2. Secure the planks using another commercially available adhesive such as Liquid Nails, or Gorilla Glue to adhere the planks where they have released. Make sure to apply pressure for a good amount of time so the adhesive can properly bond.
Q: Does the VacuuBond adhesive have a vapor barrier?
A: VacuuBond does not have a vapor barrier, but we do sell a membrane primer which does have a vapor barrier.
Q: Do you ship to Canada?
A: Yes, we do ship to Canada, however free shipping does not apply. The purchaser is the responsible party for all shipping costs, taxes, and duties.
How do I measure SQ. FT.?
Q: How do I calculate square footage of my wall?
A: Take the base of your wall times the height of your wall to get total square feet.
Q: How do I calculate square footage for a triangular area?
A: Measure the length of the base of the triangle and the height of the triangle. To calculate the area of the triangle use the formula: (base x height) / 2. Multiply the base by the height and then divide it by 2.
Where can Classic Shiplap be installed?
Q: Can Classic Shiplap be installed in bathrooms?
A:Yes, Classic Shiplap Wallplanks can be installed in a full bathroom. Additional nail down may be required.
Q: Can Classic Shiplap be installed inside shower walls?
A: No, Wallplanks should not be installed inside shower walls. Wallplanks are made from real engineered hardwood and are not waterproof.
Q: Can Classic Shiplap be installed as kitchen back splash?
A: Yes, Classic Shiplap Wallplanks make a beautiful updated kitchen back splash. You can see examples on the inspiration digital showroom page.
Q: Can Classic Shiplap be installed on ceilings?
A:Yes, Wallplanks can be installed on ceilings. Our Wallplanks are one of the best products you can use for wall panel ceiling applications. Wallplanks are light weight, thin and very easy to apply. Just peel and stick to the ceiling, and then use brad nails as reinforcement per the installation instructions. There is no need to hold the plank in place while trying to nail because the pre-applied adhesive eliminates that headache.
Q: Can Wallplanks be installed around a round corner so they meet at a 90-degree angle? If so, how?
A:It depends on how round your corner is. If it is not too round, you can accomplish this by installing trim! What you can do is measure the corner to verify.
- 1. To measure, take a straight edge and put if flat to one of the walls so it is hanging at least 2” over the edge.
- 2. Then, take either a ruler or a tape measure and put it flat to the other wall.
- 3. Measure the distance from the end of the rounded wall to the 90-degree meeting point of the straight edge & ruler/tape measure. Please note this measurement and keep it handy. If the measurement is less than 1.25” then you should be able to accomplish this by installing two trim pieces on each wall.
- 4. When installing the trim, make sure you use the measurement you made note of to know how far into the trim piece you should nail. This is to ensure that you are nailing the trim down into the actual wall.
Q: Can Classic Shiplap be installed on fireplace walls?
A: Follow local code. As long as the immediate surrounding of the fireplace opening is nonflammable Classic Shiplap can be installed on the sides of that, around and above.
Q: Can Classic Shiplap be installed in elevators?
A: YesClassic Shiplap can be installed inside an elevator. As long as the elevator surface is flat, clean, and structurally sound. Be sure to follow the Classic Shiplap installation instructions. The elevator needs to follow proper code in order to pass inspection.
Q: Will the planks hold up in high humid locations like lake communities without warping or changing?
A: Classic Shiplap planks are made from 100% wood and are designed for interior installations only. For best long-term performance permanent HVAC should be on and maintained with a relative humidity to the home or business between 30-55% for a minimum of 14 days prior to installation as well as during and after installation. If you suspect a change in humidity, allow ¼” expansion space for every 10’ of the wall on all sides. Additional nail down may be required for high humid locations.
Q: Can Wallplanks be installed outside?
A: No, Wallplanks cannot be installed in an outdoor setting. The HDF core is made from real wood and will therefore absorb moisture. Wallplanks are only approved for indoor installations.
What surfaces can Classic Shiplap adhere to?
Q: What kind of textured walls will Classic Shiplap adhere to?
A:It is recommended that all walls be tested with a sample prior to full installation. Heavy textured walls like knockdown or popcorn walls will require a skim coat application or sanding and scraping prior to installing Wallplanks. Ply wood and unfinished dry walls will require a coat of basic paint primer applied and dried first before installing Wallplanks.
All other textured walls like crows feet, orange peel, smooth or swirl will should not require additional prep work.
Q: Can Wallplanks be installed on a cement or concrete surface?
A: Yes, Wallplanks can be installed on cement, a cinder block, or on a concrete surface. First you will need to either apply a coat of paint or primer sealer, or you can skim coat the wall, or sand and scrape the textured wall. Next make sure the surface is clean and dry. Once the surface is dry you can start installing Wallplanks according to the instructions.
Q: Can Wallplanks be installed over paneling?
A:Yes, Wallplanks will adhere to paneling. Wallplanks will adhere to a clean, dry andstructurally sound surface. It is recommended that all walls be tested with a sample prior to full installation. We also recommend using a brad nailer in addition to the pre-applied adhesive for this type of installation. The reason for this is the existing wood paneling will expand and contract as well as the Wallplanks and the additional reinforcements will keep all planks in place.
Q: Sub walls are to be flat, dry, structurally sound and clean prior to installing Classic Shiplap. Define dry?
A: Moisture content of the sub-wall that is plywood or drywall should not exceed 11% using a pin-style meter. If sub wall is concrete or cinder block it should be dry using an ASTM 1869-89 Calcium Chloride test with the moisture content not exceeding 2.0 lbs. Concrete or block should also be primed or painted prior to installation for tape adhesion.
Q: Can Classic Shiplap be installed on ceramic tile?
A:Classic Shiplap can be installed on cleanceramic tile. Waxy, wet, dusty and dirty surfaces are the only surfaces that would cause adhesion issues.
Q: Can Classic Shiplap be installed over wallpaper?
A:Clean, Smooth, well-adhered wallpaper:This can be a base for Classic Shiplap. The installer must make sure the wallpaper is clean and firmly bonded to the wall before applying the planks to the wallpaper.
Embossed wallpaper: The adhesive on the back of the Classic Shiplap is 1/32" thick. If the embossing on the wallpaper raises out more than that it is possible that the plank adhesion will be interrupted every time it goes over the embossing. This could result in less than a firm bond. The installer will need to test bond strength with several Classic Shiplap plankss to ensure adhesive bond strength to the embossed wallpaper before proceeding with the entire installation. If bond strength is not sufficient, the wallpaper will have to be removed prior to installing the Classic Shiplap.
Textured wallpaper: should be removed and the base wall cleaned with trisodium phosphate ( TSP) before installing Classic Shiplap. To remove wallpaper there are steamers or wallpaper removal solutions available. These items plus the TSP cleaner are available in hardware stores or home centers.
Q: Can Classic Shiplap be installed over a mirrored surface?
A: Yes Wallplanks can be installed over a mirrored surface as long as the mirror is smooth, flat, structurally sound and cleaned prior to installation and a J-roller is used when applying the Wallplanks.
Installation Questions:
Q: Do Wallplanks need time to acclimate?
A:Per our installation instructions, to ensure proper adhesion and to avoid future movement such as gapping between boards and cracking on the face of the planks, permanent HVAC must be on and maintained between 60 ̊ - 75 ̊ F with relative humidity in the home between 30-55% for a minimum of 14 days before installation, as well as during and after installation. To accommodate for any changes in humidity, allow 1/4" expansion space for every 10' of the wall on all side. You do not have to acclimate the planks to the environment but you should acclimate the environment to be suitable for the installation of the planks. If you are concerned and would like extra assurance, you may use a nail gun and brad nails in addition to the pre-applied industrial strength adhesive on the back.
Q: What tools do I need for installing Wallplanks?
A: To install Wallplanks you will need a J-roller, TSP (trisodium phosphate) for cleaning sub wall, tape measure, 4' level, a straight edge, and a pencil. Possible cutting tools include hand saw, jig saw, or miter saw.
Q: How long does it take to install Wallplanks?
A: The length of time it takes to install Wallplanks depends on how big your wall is. A small accent wall would take no more than a few hours to complete. For larger walls, you could make a fun weekend project out of this!
Q: Which shiplap edge should I start with?
A: Wallplanks have a shiplap edge on both sides of the plank. If you are starting from the bottom of your wall, apply the first row of planks with the groove side up. With the next full row of planks, approach the shiplap joint at a 45° angle and interlock appropriately. Be careful to only overlap the underlying shiplap joint.
Q: Are Classic Shiplap Wallplanks seamless on the ends once installed?
A: No, the Wallplanks are not seamless but from different perspectives and distances the seam is often not noticed.
Q: How do I install Wallplanks if my wall is uneven?
A: To install Wallplanks on an uneven surface you need to trace the uneven ceiling and or floor and rip cut your Wallplanks to fit the uneven surface.
Q: How do I cut Wallplanks to fit around an obstruction like a light switch, outlet, or vent?
A: Measure and trace the obstruction with a straight edge and pencil on the planks before removing the paper liner from the glue. Cut the traced obstruction space on the planks using a jig, hand or scroll saw. Place the cut Wallplanks over the obstruction to ensure a proper fit. Remove the release paper and install. Don't forget to use the J-roller.
Q: How do I stagger the Wallplanks?
A: See our image below on how to stagger the Wallplanks. The rule of thumb is 12" minimum offset. The goal is to not repeat or line up offset lines for at least every 3-4 rows. Try to avoid having boards that are shorter than 12" in your pattern.
Q: How can I install Wallplanks in a chevron pattern?
A: To install Wallplanks in a chevron pattern, simply cut each plank at the required angle for your installation and match the planks up.
Q: How can I install Wallplanks in a herringbone pattern?
A: When installing Wallplanks in a herringbone pattern, you need to evaluate where the shiplap edge should be cut and removed. You can remove the shiplap edge using a jig, hand or scroll saw. Cuts are generally made at a 45 degree angle. A helpful hint is to router the ends that don't butt up for a smoother installation. Once you have your starting point, continue to add boards to the wall working your way outward. Once you finally get to the corners, you can use your scrap pieces.
Q: Can Wallplanks be installed vertically?
A: Yes! Simply follow the same instructions, but begin your starting line vertically instead!
General Questions:
Q: What is Peel and Stick Wallpaper made of?
A: Peel & Stick Wallpaper is manufactured with proven proprietary adhesive that grips the wall tightly but won't form a bond. This product is engineered for easy application on and instant removal from smooth, flat surfaces. It is repositionable, removable and reusable, and never leaves any sticky residue on the applied surface.
Q: How do I apply Peel & Stick Wallpaper?
A: Applying Peel and Stick Wallpaper is the easiest wallpaper you’ll ever apply. Just peel and stick on the wall or any smooth, flat surface. Find detailed instructions in a step-by-step hanging guide and watch how easy it is to install. See our installation page for more detailed installation instructions.
Q: Is Peel & Stick Wallpaper easy to cut?
A: Yes! Use scissors or a razor knife to cut the product into strips or to customize to your space. A razor knife is recommended when trimming.
Q: Can I clean the product once it is on the wall?
A: Yes Wallplanks Peel & Stick Wallpaper is washable and can be cleaned using a mild detergent and a damp sponge or cloth.
Q: How do I remove Peel & Stick Wallpaper?
A: To remove this product, start at the top corner and gently pull firmly, evenly and slowly downward, working parallel to the surface. Be careful not to over stretch the material. Do not allow the adhesive surfaces to make contact with each other as they are very difficult to separate without damaging.
Q: Can I reuse this product after removal?
A: Yes! Peel and Stick Wallpaper is reusable. Use on walls and then peel off and reuse for another project. Sticky residue is not left behind on surface when removed.
Q: Do you ship to Canada?
A: Yes, we do ship to Canada, however free shipping does not apply. The purchaser is the responsible party for all shipping costs, taxes, and duties.
How do I measure SQ. FT.?
Q: How do I calculate square footage of my wall?
A: Take the base of your wall times the height of your wall to get total square feet.
Q: How do I calculate square footage for a triangular area?
A: Measure the length of the base of the triangle and the height of the triangle. To calculate the area of the triangle use the formula: (base x height) / 2. Multiply the base by the height and then divide it by 2.
Where can Wallplanks Wallpaper be installed?
Q: What surfaces are best to apply Peel & Stick Wallpaper on?
A: Peel & Stick Wallpaper can be applied to any smooth, flat and clean surfaces and includes the following:
- Walls, Doors, Entryways, Cabinets, Stairs, Furniture, Frames and Mirrors
Q: Can I apply Peel & Stick Wallpaper on newly painted walls?
A: Please allow newly painted surfaces (and freshly hung wallpaper) to fully cure for a minimum of 4 weeks before applying this product.
Q: Can Peel & Stick Wallpaper be installed in a full bathroom?
A: Yes you can install our Wallpaper in a full bathroom. Just make sure the wall is 100% clean and dry prior to installation and allow hours for the adhesive to set before taking the next shower.
Q: Can Peel & Stick Wallpaper be installed outside?
A: No, Wallpaper cannot be installed in an outdoor setting.
Q: Can Peel & Stick Wallpaper be installed on the ceiling?
A: No, Wallpaper cannot be installed on the ceiling. We cannot guarantee the Wallpaper will stay up on the ceiling if installed. You can try and use reinforcements for extra strength, but we are not liable if the Wallpaper does note stick on the ceiling.
What surfaces can Wallplanks Wallpaper adhere to?
Q: What surfaces are best to apply Peel & Stick Wallpaper on?
A: Peel & Stick Wallpaper can be applied to any smooth, flat and clean surfaces and includes the following:
- Walls, Doors, Entryways, Cabinets, Stairs, Furniture, Frames and Mirrors
Q: Do I really need to clean my surface before applying this product?
A: For best results, we do recommend the surface is cleaned and dried to ensure best results. To clean, use a sponge or cloth and gentle cleaner or mild detergent. Make sure the surface is completely dry before applying product to it.
Q: What surfaces should I not apply Peel & Stick Wallpaper to?
A: Peel & Stick Wallpaper will not adhere to unclean or heavily textured surfaces. Do NOT apply to lacquered furniture. Please note, the fading of furniture exposed to sunlight is not related to the use of our product.If unsure of your surface, we recommend testing in an inconspicuous area before applying. When testing or using product, keep away from cribs and out of reach of young children to prevent choking hazard.
Q: Can Wallpaper be installed over unfinished drywall?
A: Yes, you can install Wallpaper over unfinished drywall but it will need to be primed first. We recommend a latex primer. Please allow for a minimum of 4 weeks for the primer to fully cure before applying this product.
Q: Can I apply Peel & Stick Wallpaper on newly painted walls?
A: Please allow newly painted surfaces (and freshly hung wallpaper) to fully cure for a minimum of 4 weeks before applying this product.
Q: Can Peel & Stick Wallpaper be installed over existing wallpaper?
A: No, our Wallpaper is not recommended for installation over existing paper.