Your Cart is Empty


How to Use Decorative Wall Panels to Elevate Your Home Design


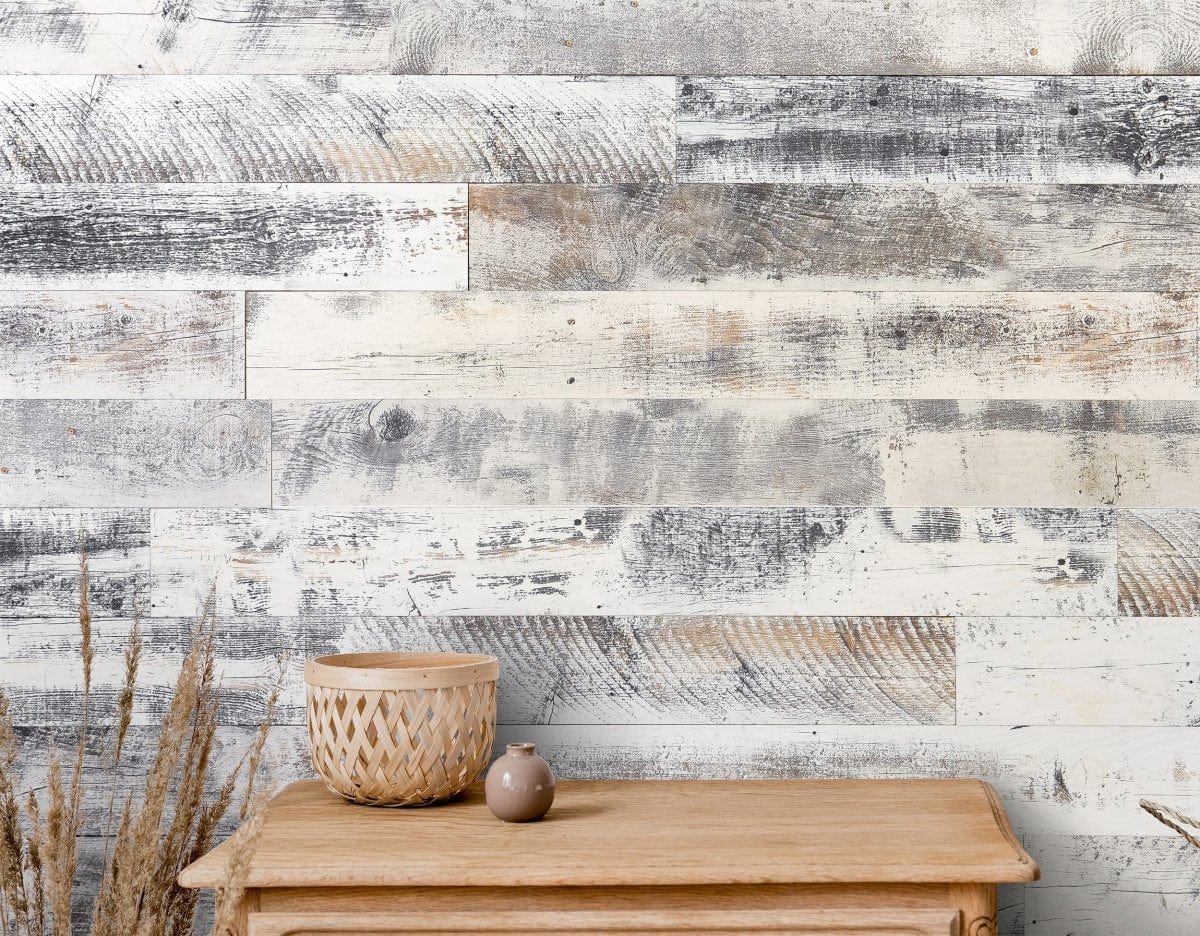
Decorative wall panels are one of the most versatile, high-impact tools in a designer’s kit. They add depth, texture, and character where flat paint can’t, and they do it with a finish that feels intentional and enduring. Whether you prefer streamlined modern interiors or warm, layered spaces, decorative wall panels can anchor a room, create subtle rhythm, and solve practical challenges like scuffed drywall or echo-prone rooms—all while boosting perceived value.
Why Decorative Wall Panels Work So Well
When you add dimension to vertical surfaces, you immediately change how light moves in a room and how people experience it. Panels provide:
-
Instant architecture. In newer builds or plain spaces, panels simulate the detail you’d find in historic millwork or contemporary custom carpentry.
-
Texture and warmth. Wood tones and tactile finishes soften hard surfaces and create visual comfort.
-
Design clarity. Panels define zones—think of an entry drop zone or a headboard wall—without moving a single wall.
-
Durability. Quality panels protect high-traffic areas better than paint, resisting dings and fingerprints.
-
Acoustic benefits. Linear and slatted profiles scatter sound and reduce harsh echoes, especially in open-concept rooms.
Choosing a Panel Style That Fits Your Aesthetic
Before you add panels, align the profile and finish with your design language. A few proven directions:
-
Shiplap and nickel-gap planks. Clean lines, coastal-to-transitional appeal, and a crisp backdrop for art or shelves.
-
Slatted/linear panels. Vertical fins or narrow planks read sleek and architectural, excellent for modern and Scandinavian-leaning interiors.
-
Board-and-batten or wainscoting. A classic solution that adds formality and protects lower walls in dining rooms, entries, and hallways.
-
Geometric or 3D panels. For statement walls, geometric reliefs cast dynamic shadows and offer a contemporary edge.
-
Wide-plank wood. Natural grain offers warmth and subtle movement; great for living rooms and bedrooms seeking a calm, organic note.
-
Herringbone and chevron layouts. Directional patterns energize feature walls, fireplace surrounds, or bar nooks.
Tip: Bring home a few samples and set them against your existing floors, trim, and furnishings. Make sure wood tones complement—not compete with—your flooring species and stain.
Where to Install Panels for Maximum Impact
Strategic placement matters as much as product selection. Start with high-visibility walls and functions:
-
Entryway or mudroom. Half-height wainscoting with hooks above keeps walls tidy and sets a polished first impression.
-
Living room focal wall. Flank a fireplace or TV with panels to create a media feature that hides wires, frames shelving, and makes the room feel built-in.
-
Dining room. Wainscoting adds structure and pairs well with statement lighting. Keep chair-rail height roughly one-third of the wall height for balance.
-
Primary bedroom. A panel-clad headboard wall adds luxury; continue the treatment to the ceiling for visual height.
-
Home office or study. Linear slats or wood planks behind your desk improve video-call backdrops and soften acoustics.
-
Hallways and stairwells. Vertical panels elongate narrow corridors and protect surfaces in high-traffic zones.
-
Ceilings (“the fifth wall”). A plank ceiling with clean perimeter trim can transform a space without adding clutter.
-
Kitchen islands and peninsulas. Panel the stool side of an island for texture and durability.
-
Powder rooms. A small space loves big character; panels add polish without overwhelming. Keep away from direct splash zones or use properly sealed finishes.
Design Moves That Make Panels Feel Custom
Elevate the result with designer-level details:
-
Orientation as a design lever. Vertical lines add height and formality; horizontal lines widen a room and lean casual; diagonal or chevron layouts are lively and sculptural.
-
Scale and proportion. On tall walls, consider two-thirds paneling with a top cap to keep sightlines balanced. On lower ceilings, stick to half-height to avoid visually compressing the space.
-
Color strategy. Natural wood reads warm and timeless. Painted panels (from soft whites to deep charcoals) create subtle or dramatic backdrops. If you’re pairing with painted drywall, ensure enough contrast to highlight the relief.
-
Shadow play with lighting. Wall-grazing sconces or concealed LED strips emphasize texture and turn panels into evening art.
-
Trim and transitions. Finish edges with clean outside corners or matching trim. Coordinate baseboards and casings for a cohesive look.
-
Integrated storage. Float shelves or build a ledge into panel layouts for display and function.
-
Art and panels together. Panels don’t replace art—they frame it. Large-format art on a paneled wall feels gallery-grade.
Planning and Installation: Practical Tips
Even the best material needs a disciplined plan. Use these professional steps:
-
Measure twice, plan once. Sketch the wall and mark heights, outlets, and obstacles. For patterned layouts, center your design where the eye naturally lands (fireplace, sofa, bed).
-
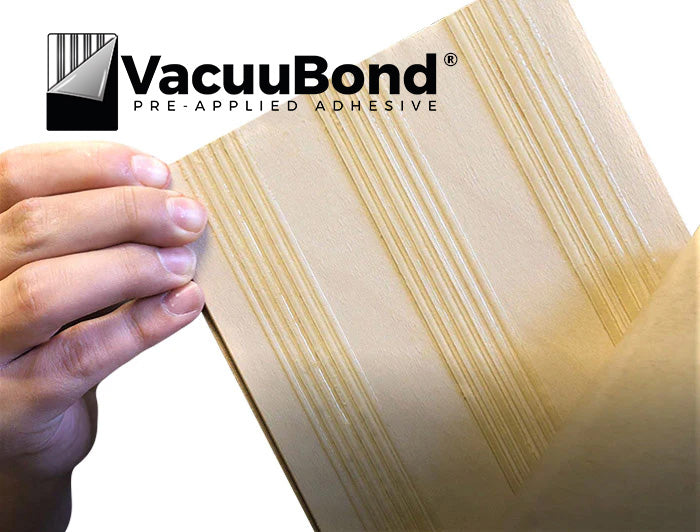
Acclimate materials. Especially for wood-based products, allow time in the space per manufacturer guidance. This helps manage expansion and contraction.
-
Prep the surface. Clean, dry, and sound walls are non-negotiable. Snap level chalk lines to guide your first course.
-
Start straight. Begin at the most visible corner or the centerline of a focal wall so any small cuts land in inconspicuous areas.
-
Mind the substrate. Hit studs when fastening heavier panels. For adhesives, follow coverage recommendations and support pieces while they set.
-
Account for movement. Leave manufacturer-recommended gaps at floors, ceilings, and corners; cover with trim for a clean finish.
-
Cut safely and cleanly. A sharp blade and painter’s tape on cut lines minimize tear-out on finished faces.
-
Handle outlets and switches. Shut off power, remove cover plates, and use extenders so plates sit flush against the new panel depth.
-
Test finishes. If you’re staining or painting, sample on an offcut and check the color at different times of day.
-
Maintenance plan. Most prefinished panels wipe clean with a soft, damp cloth. Avoid harsh chemicals that can dull finishes.
Rental or commitment-shy? Consider mounting panels to thin plywood as a removable “art wall,” hung with a French cleat. You’ll get the look without marking every square inch of drywall.
Sustainability and Sourcing Considerations
Beyond aesthetics, investigate where materials come from and how they’re made. Domestic manufacturing supports local jobs and often shortens lead times. North American–sourced materials streamline supply chains and can reduce transport footprint. Look for products with clear sourcing and finishes engineered for indoor environments. For wood looks, engineered constructions use hardwood more efficiently while delivering stability and beauty.
Room-by-Room Ideas to Spark Creativity
Sometimes the best inspiration is specific. Use these targeted concepts to get started:
-
Living Room TV Wall: Pair vertical slatted panels with a low-profile media console. Conceal cable channels behind the panels for a seamless look.
-
Dining Room Wainscoting: Install panels to 36–42 inches high, add a simple top rail, and paint the upper wall in a contrasting tone. This mix feels both modern and classic.
-
Kitchen Island Upgrade: Wrap the stool side in wide-plank panels and finish with a streamlined top cap. It resists scuffs and elevates a builder-basic island.
-
Primary Suite Headboard: Run wood planks horizontally from bed width to ceiling, then flank with slim wall-mount sconces. The bed area becomes an elegant focal zone.
-
Kids’ Room Durability Band: Panel the lower 48 inches of wall for bump protection; paint above in a playful color that can change as tastes evolve.
-
Powder Room Drama: Choose a deep-toned panel for half-height walls; add a statement mirror and sconce to complete a boutique-hotel feel.
-
Entry Drop Zone: Combine panels with a floating shelf and concealed charging cubby. Hooks go above the rail; a bench tucks below.
-
Home Office Acoustics: Line the wall behind your desk with linear panels to calm sound and create a polished Zoom background.
-
Stairwell Showcase: Use vertical planks to guide the eye upward; cap the run with a gallery ledge for family photos.
-
Ceiling Feature: In a den or loft, a plank ceiling adds richness and subtly defines the zone in an open plan.
Common Mistakes to Avoid
A few pitfalls can undermine an otherwise strong concept:
-
Overcomplicating the layout. Bold patterns need breathing room. Keep adjacent walls simpler so the feature shines.
-
Ignoring scale. Oversized relief on a low 8-foot wall can feel heavy; adjust profile and panel height to ceiling height.
-
Skipping samples. Colors look different under your lighting and next to your floors; always test first.
-
Forgetting about lighting. Without adequate wash or grazing light, texture gets lost. Plan fixtures before install.
-
Underestimating moisture. In kitchens and baths, position panels away from direct splash or select finishes designed to handle those conditions per manufacturer guidance.
-
Neglecting trim. Unfinished edges or mismatched baseboards make the installation look amateur.
-
Rushing the first row. If the starting course isn’t dead-level, everything telegraphs.
Budgeting and Phasing Your Project
Panels can scale with your budget:
-
Start small. A single feature wall in a living room or bedroom delivers major impact at a manageable cost.
-
Phase the work. Tackle high-visibility areas first, then continue into hallways and secondary spaces as budget allows.
-
Value engineering. Use premium panels where you interact with the wall (entries, dining) and consider simpler profiles in secondary areas.
-
DIY vs. pro install. Many systems are designed for straightforward DIY installation. Larger or more complex patterns—especially around fireplaces or stairwells—may warrant a professional for crisp results.
Why Homeowners and Designers Choose Wallplanks
When you’re ready to specify or install panels, partner with a company that understands both craftsmanship and usability.Wallplanks is a U.S. company based in Weston, Wisconsin, founded in 2017 by industry expertTryggvi Magnusson. From the beginning, Tryggvi set out to developdurable, beautiful, and high-performing wall products that areeasy to use and capable of transforming any interior—residential or commercial. Wallplanks products are manufactured by our parent company,From the Forest, LLC (founded in 2007), an industry flagship known for premium hardwood flooring made in the United States. All materials aresourced from North America, underscoring a commitment to quality, responsible sourcing, and reliable supply.
That combination—design-forward surfaces, practical installation, and American manufacturing—means you get the visual impact you want without compromising on performance or support. Whether your project calls for refined linear profiles, classic planks, or tailored wainscoting, Wallplanks provides options that meet professional standards while remaining approachable for DIYers.
Final Thoughts
Decorative wall panels do more than decorate; they define spaces, solve real-world problems, and add the sense of permanence that separates “finished” rooms from forgettable ones. By selecting the right style, planning layout and lighting, and minding execution details, you’ll create walls that look custom-built and age gracefully.
Shop with Us Today
If you’re ready to elevate your space with decorative wall panels, explore our collection. As a U.S. company based inWeston, Wisconsin, founded in2017 by industry expertTryggvi Magnusson, we’re committed to making wall transformations straightforward and rewarding. Our products are manufactured byFrom the Forest, LLC, andall materials are sourced from North America. Order samples, compare finishes in your own lighting, and see how quickly your home can feel more tailored and complete. Have a project in mind? Reach out to our team for guidance—we’re here to help you plan with confidence and install with ease.