Your Cart is Empty


The Ultimate Guide to Shiplap Paneling: What You Need to Know


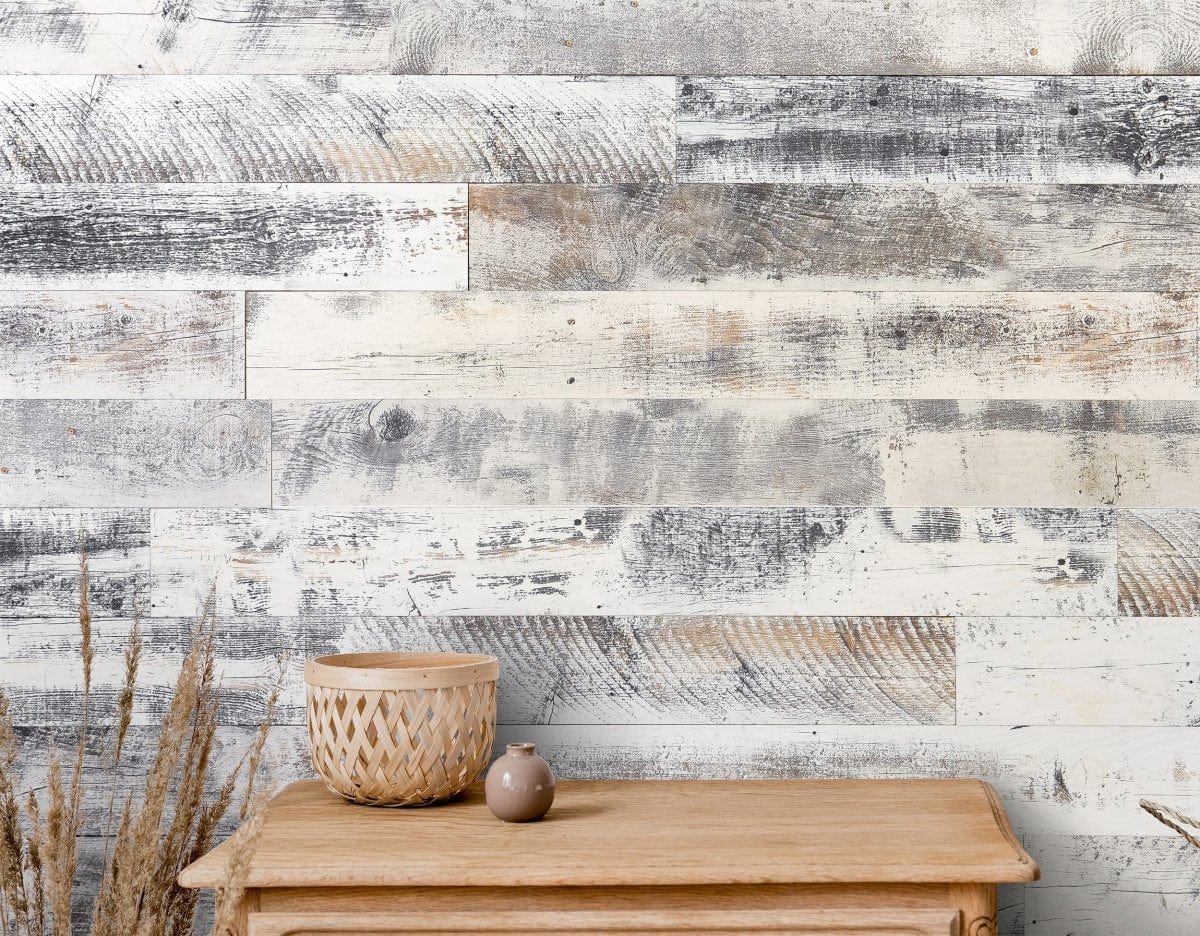
Shiplap paneling has gained immense popularity in recent years due to its timeless and rustic charm. This versatile wall treatment instantly adds character and sophistication to any space, whether it be a cozy farmhouse, a contemporary loft, or a beachside retreat. If you're considering installing shiplap paneling in your home or office, this guide will provide you with all the essential information you need.
What is Shiplap Paneling?
Shiplap paneling is a type of wall treatment that originated in the early 19th century as a durable and weatherproof covering for the exteriors of buildings. However, it has found its way indoors, where it is now used for various design purposes. Shiplap consists of wooden boards that overlap each other, creating a distinctive groove and tongue joint. This joint creates an attractive, tight fit that mitigates the expansion and contraction of wood due to temperature and humidity changes.
Choosing the Right Material
When embarking on a shiplap paneling project, it is important to select the right material. The most commonly used materials for shiplap paneling include pine, cedar, and MDF (Medium-Density Fiberboard). Pine and cedar are natural wood options that exude warmth and character. While MDF is an engineered wood product, it offers a smooth and uniform finish that is easier to paint. Consider the style of your space, your budget, and the level of maintenance required when choosing the material for your shiplap paneling.
Preparing Your Walls
Before installing shiplap paneling, it is crucial to prepare your walls adequately. Start by removing any existing wall coverings, such as wallpaper or paint. Fill in any holes or cracks with a suitable filler and sand the walls to create a smooth surface. If you plan to install shiplap over an existing drywall, ensure it is firmly attached to the studs to avoid any movement or flexing that could affect the stability of the paneling.
Installation Methods
There are two primary installation methods for shiplap paneling: horizontal and vertical. The choice between the two depends on your personal preference and the desired look you wish to achieve.
1. Horizontal Installation: Horizontal shiplap paneling is the more traditional and popular choice. It creates a visually elongated and spacious appearance, making it ideal for smaller rooms. This method involves starting at the bottom and working your way up, overlapping the boards to conceal any gaps. Horizontal paneling is often associated with a more rustic and casual aesthetic.
2. Vertical Installation: Vertical shiplap paneling offers a unique twist to the conventional horizontal approach. It draws the eyes upward, making rooms appear taller and more elegant. This method is particularly suitable for spaces with high ceilings. It follows the same installation process as horizontal paneling, with each board overlapping the one below it. Vertical shiplap paneling creates a more modern and sleeker look.
Installation Steps
Regardless of the installation method you choose, the steps involved in shiplap paneling installation remain largely the same. Here is a comprehensive guide to help you through the process:
Step 1: Measure & Plan - Accurately measure your wall space to determine the number of shiplap boards needed. Consider any openings or obstacles that might require custom cuts.
Step 2: Acclimate the Material - Allow the shiplap boards to acclimate to the room's temperature and humidity for at least 48 hours to prevent any warping or shrinking after installation.
Step 3: Cut the Boards - Cut the shiplap boards to the desired length using a miter or a circular saw. Remember to account for any overlapping required for a tight fit.
Step 4: Install the First Row - Start from the bottom of the wall and ensure the first row is level. Use a stud finder to locate the studs and secure the boards with nails or screws. Leave a small gap between the boards to accommodate for wood expansion.
Step 5: Continue the Installation - Work your way up, overlapping the boards with the tongue and groove joints. Remember to stagger the seams for a cohesive and seamless look.
Step 6: Trim and Complete - Measure and cut the last row of boards to fit snugly against the ceiling or crown molding. Use a trim nailer or finish nails to secure the final row. Fill any nail holes with wood filler and sand the surface for a smooth finish.
Maintenance and Care
Shiplap paneling is relatively low maintenance, but proper care ensures its longevity and continued beauty. Regularly dust or vacuum the surface to prevent the accumulation of dirt or debris. To clean stubborn stains:
- Gently wipe the paneling with a damp cloth and mild detergent.
- Avoid using abrasive cleaners or tools that can scratch or damage the wood.
- Follow the manufacturer's recommendations and guidelines if your shiplap paneling requires refinishing or repainting.
Why Choose Wallplanks
When it comes to selecting shiplap paneling, Wallplanks stands out as a top choice. Our commitment to quality, craftsmanship, and customer satisfaction makes us a trusted leader in the industry. Wallplanks offers a wide range of shiplap paneling options, including real wood and peel-and-stick varieties. Our extensive selection of finishes, colors, and styles allows you to find the perfect shiplap paneling to suit your taste and design vision.
Shop Wallplanks Today
Ready to elevate your space with shiplap paneling? Visit Wallplanks and explore our exceptional collection of shiplap paneling options. With Wallplanks, you can trust in the quality and beauty of our products and enjoy the transformational power of shiplap paneling in your home or office. Start your journey today and create a space that embodies rustic elegance and design excellence with Wallplanks.